Category Archives: Excel

Excel’s color palette explained

Problem

Excel’s color palette contains 56 colors, all of which can be accessed and most of which can be replaced using ExcelWriter (v6 or later). This post describes the layout of the palette and enumerate the default palette colors.

This content is most pertinent to the Excel 2003 color palette, which only has 56 colors. In Excel 2007 and later, workbooks can support millions of colors, but there is still an underlying workbook palette that has 56 colors. For more information about colors in multiple versions of Excel, we have enough post about workbook colors that are not displayed properly in older versions of Excel.

Solution

The palette is split up into a few different sections: Continue reading Excel’s color palette explained

How to create hyperlinks between cells in an Excel spreadsheet

Problem

Your application requires cells to contain hyperlinks to other cells in the same spreadsheet, but the Cell.CreateHyperlink function only makes links to URLs on the internet. This article discusses a workaround using Excel’s HYPERLINK function.

Solution

Excel has a function named hyperlink() that, with some special syntax, can create links to other cells in a spreadsheet.

Normally, the hyperlink function creates a link to a URL, much like the CreateHyperlink function. Simply passing the name of a cell to the function causes it to form a bad link; Excel will interpret it as a URL.

The solution is to enclose the name of the destination cell in quotes and preface it with a pound sign. For example, a cell with formula =HYPERLINK(“#Sheet2!C3”, “Link to C3”) will contain the text “Link to C3”, and function as a hyperlink to that cell in Sheet2. The formula can be set either by editing an Excel file directly, or through setting the Cell.Formula property in ExcelWriter.

When the user clicks on the link, Excel’s focus will move to Continue reading How to create hyperlinks between cells in an Excel spreadsheet

What’s new in OfficeWriter 8.5

Spring has sprung, bringing with it our newest release of OfficeWriter: OfficeWriter 8.5!  What’s in store for this maintenance release? Scroll down to see the latest additions our development team has been working on.

WordTemplate – Embed DOCX files into templates

In OfficeWriter 8.0, we added the ability to embed RTF or HTML documents in Word files with WordTemplate.  The feature uses the document modifier to signify that a RTF or HTML document will be inserted. To learn more about using the document modifier, see our guide on inserting an embedded document under our WordTemplate Tutorials.

HTMLtoWord

We have also extended the feature to include DOCX files. Now you can embed other Word documents into your WordWriter templates. Continue reading What’s new in OfficeWriter 8.5

5 Underutilized Excel Features To Take Advantage Of

Let’s get straight to the point, because frankly who wants to waste any more time finagling your data and reports? The following are the top 5 Excel features I use on a constant basis to get the most out of my data.

For reference, you can download the example workbook I used in this post: Top5ExcelFeatures.xlsx

#5 – What-If Analysis

WhatIfAnalysis

I actually only started using this one recently, but it’s quickly become a favorite. I’m particularly fond of the Scenario Manager function. What-If Analysis is comprised of three pieces: Scenarios, Goal Seek, and Data Tables. 

Scenarios has the ability to define a scenario that is associated with a particular set of cell values. You can define new scenarios that are tied to different cell values. When a new scenario is loaded, all of the values update. This is great for flipping between Best Case and Worst Case views of a worksheet.

WhatIfAnalysis2

The other two pieces are Goal Seek and DataTablesIn Goal Seek, Excel automatically computes and finds a calculated value based on the value of another cell, such as finding an interest rate based on a monthly payment. Data Tables allows you to hook up entire tables of values based on up to two variables.

#4 – Sparklines

Sparklines

These mini-charts were released in Excel 2010 and they provide a quick way to Continue reading 5 Underutilized Excel Features To Take Advantage Of

How to tell which Office service pack is installed

A few days ago, I installed the Office 2010 Service Pack 1 and to my dismay, I couldn’t actually tell if it had installed. The version under Program and Features hadn’t changed. There were some really complicated instructions by Microsoft for determining if SP1 had been installed, but then I stumbled across Chris Heacock’s (@chrisheacock) blog post on Verifying 2010 SP1 installations, which saved me so much time.

So here you go, a rehash of how to tell what service pack is installed in Office 2010, along with 2007 and 2003!

Office 2010

  1. Open an Office application, such as Excel or Word.
  2. Go to File.
  3. Go to Help.
  4. On the right-hand side, under Version, there should be a link to Additional Version and Copyright Information. Click that link.
  5. In the About window, you should see the full version (e.g. Microsoft Excel 2010 (14.0.6024.1000) followed by an MSO number. If you see “SP1,” then you have service pack one installed.

2010

Office 2007

  1. Open an Office application, such as Excel or Word.
  2. Go to the Windows icon.
  3. Go to Excel Options (or the equivalent for the application you’re using, such as Word Options).
  4. Go to Resources.
  5. Under Resources will be a section about Microsoft Office Excel 2007 (or Word etc.) Continue reading How to tell which Office service pack is installed

March Madness: Predict Your NCAA Basketball Brackets with Excel

Every year in March, the NCAA hosts the college Men’s Basketball Tournament. Every year, I go through all of the teams, create my brackets, and see if I can do better than my friends. My one downfall is I always have my favorites: you know, the teams you follow because you went to school there, the team your significant other cheers for, your alma mater’s arch-nemesis, or the team with that really cool mascot. Whatever the reason, the biases end up costing you the first round, sidelining you out of the pool. What we need is a simple way to generate our bracket and remove some of that bias.

Instead of using a totally random outcome, let’s use a few of Excel’s analytical features to increase our chances of putting together a winning bracket. Let’s take Mens NCAA Basketball tournament data since 1985 (courtesy of The Washington Post‘s database), that has the history for specific seeds, teams, coaches and conferences – everything from each school’s tournament results to how No. 7 seeds have fared against No. 10 seeds in the first round. Using this data as a starting point allows us to inject reality into our random numbers. Because really, it is not ever worth considering if a 16 can beat a 1, right?

After copying and pasting the data from the webpage into an Excel spreadsheet, it’s time to input the formulas. It’s basically a two-step process. What we need to calculate is the probability of a particular seed winning or losing. If you hadn’t seen it before, a 9 seed beets an 8 seed more often than not, and a 1 seed has never lost. The pivot table I created reflects that, proving to be a useful tool in our selection process. It’s not too difficult to create a pivot table by seed and win/loss and by round for our source data. (See the workbook attached at the end of this post.)

First Pivot Table

Next, we develop a formula that uses the probabilities along with the RAND() function to predict the outcome of a match-up. All we need to do is apply the random number to the pivot table data to determine which of the two seeds advance to the next round. There is no easy way to do this, except with a long and complicated formula. Luckily, most of the formula is calculated by Excel by doing a simple click. The two Excel functions that get this done for us are the RAND() and the GETPIVOTDATA(). RAND() is well documented, but the GETPIVOTDATA() allows us to treat the pivot data like a database to get our probability for a seed to win the match-up.
Bracket

After playing with the output for a few runs, I noticed that the later rounds are fully dominated by the higher seeds. That happens because of the limited data for lower seeds in the later rounds. I want to allow for those Special Case teams to triumph over the Big League teams, so I added Continue reading March Madness: Predict Your NCAA Basketball Brackets with Excel

2013 Business Intelligence Trends

Credit: e-bcorp.com

A few weeks ago we posed the question of whether or not Excel had the staying power to be the next great Business Intelligence tool. An overwhelming percentage of readers said yes. This week we decided to delve further into what else is on the horizon for the Business Intelligence arena.

Each year experts and industry leaders make their predictions on what lies ahead on the Business Intelligence landscape. We’ve distilled those predictions down to ones that appeared several times over. Looking at TechTarget, InformationWeek, Forrester, and Tableau Software, we scoped out the top Business Intelligence (BI) trends for 2013 and this is what we discovered.

  1. Cloud BI – The cloud isn’t going anywhere. It still has a lot of attention, despite the reliability, performance, availability, and privacy concerns from your IT department. The cloud’s ability to adjust to larger and larger data sets and petabytes of information makes it attractive for the Business Intelligence arena. TechTarget doubts moving infrastructure to the cloud will become mainstream in 2013, but that it is definitely destined and headed in that direction.
  2. Big Data – Big Data still gets big talk. Forrester predicts a rise in Hadoop-based BI applications, particularly within the mission-critical applications. Along those same lines, Forrester sees Big Data moving out of silos and into enterprise IT. They see enterprise IT becoming more involved with enterprise BI in order to save on the costs it takes to manage Big Data.
  3. Self-Service BI – We’re seeing it with the addition of Powerview to Excel, the desire for people to be in charge of their own data with less of a reliance on IT support to pull information and make business decisions. Forrester cited: Continue reading 2013 Business Intelligence Trends

How to select slicer values with VBA

PitanHeader_short

Hello, everyone, and welcome to another edition of Pitan Pivot Mage!

Today we will cover how to select slicer values with VBA. This is especially useful if you have a report generated by OfficeWriter’s ExcelTemplate model and you can’t select the slicer values in the template file.

Intro

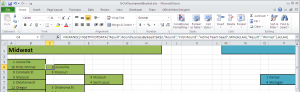
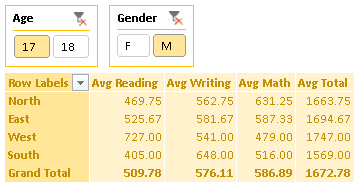
Let’s start out with an ExcelWriter report template. It has some data off to the side and a PivotTable that summarizes the test scores with averages. There are two slicers for filtering on age and gender.

Template

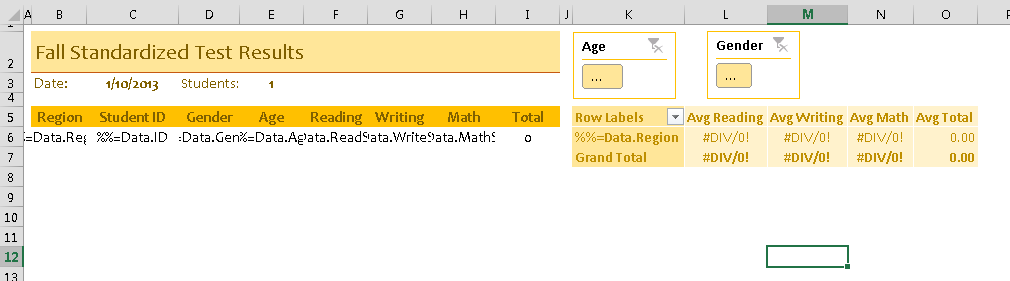
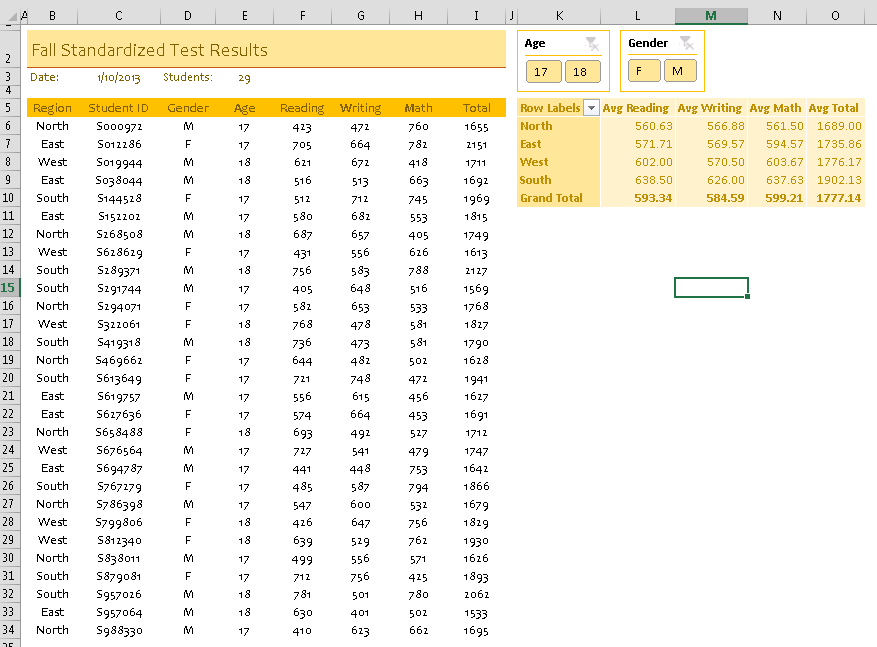
When it’s populated with data, all of the values in the slicers are automatically selected, so the default is a full view of the data.

RenderedReport

Writing the Macros

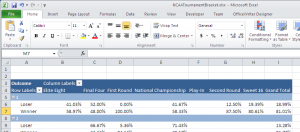
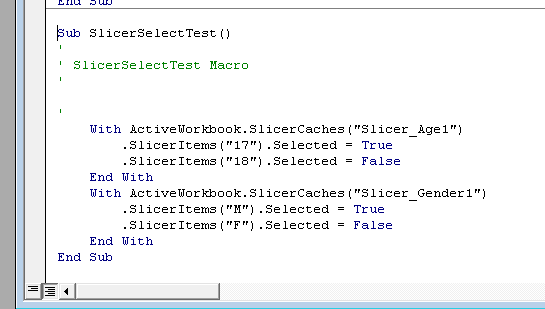
Whenever I need to write a PivotTable macro, I always start by recording myself performing the action I want and then generalize the code later. In this case, I want to select only “M” and “17” in my slicers for 17-year-old male students.

My first pass gives me some useful information:

RawMacro

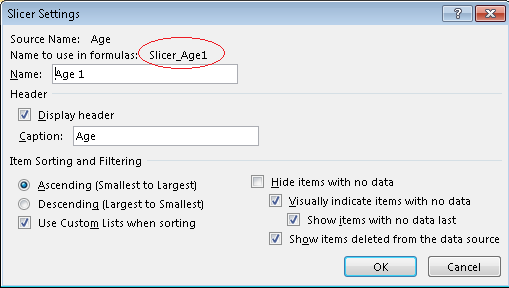
The first thing I notice is the slicer name “Slicer_Age1” and “Slicer_Gender1”. This is the name for the slicer for formulas and VBA. To find the name of your slicer, select the slicer and go to slicer settings. This is on the left, under slicer tools:

SlicerTools_Settings

The slicer tool dialog lists the name of the slicer, but also the Name to use in formulas. This is the programmatic name for the slicer that we’ll use in the macro.

Slicer_Programmatic_Age

Then I was able to generalize the macro to take a slicer name, value, and whether it should be selected or deselected:


'Selects or deselects a value (slicerVal) in a slicer (slicerName)
Sub SelectSlicerValue(ByVal slicerName As String,
ByVal slicerVal As String, ByVal isSelected As Boolean)
ActiveWorkbook.SlicerCaches(slicerName).SlicerItems(slicerVal).Selected = isSelected
End Sub

To make things easier for myself, I  created a subroutine that would select 17 and “M,” while deselecting 18 and “F.”

'Selects slicer values to display only data for 17-year-old male students
Sub SelectMale17Profile()
SelectSlicerValue "Slicer_Age1", "17", True
SelectSlicerValue "Slicer_Age1", "18", False
SelectSlicerValue "Slicer_Gender1", "M", True
SelectSlicerValue "Slicer_Gender1", "F", False
End Sub

Calling the Macros

To make sure that the macro runs when the workbook is opened, I called the subroutine in the Workbook_Open() code.


Private Sub Workbook_Open()
SelectMale17Profile
End Sub

Handling the PivotTable refresh

As outlined in our tutorial for how to use PivotTables with ExcelTemplate reports, the PivotTable needs to refresh in order for the imported data to display; the easiest way to do this is to set ‘Refresh on Open’ under PivotTable Data Properties. This poses a problem because macros in Workbook_Open() execute before the the PivotTable refresh and the slicer macros will be unable to find the values to select. This results in a run-time error.

To avoid this problem, I wrote a quick macro that refreshes the PivotTable:

'Refreshes the PivotTable as a replacement for the 'refresh on open' property
Sub PivotTableRefresh(ByVal pivotTableSheet As String, ByVal pivotTableName As String)
ActiveWorkbook.Sheets(pivotTableSheet).PivotTables(pivotTableName).PivotCache.Refresh
End Sub

And added it before the slicer code in Workbook_Open().

Private Sub Workbook_Open()
'Refresh the PivotTable with a macro because it may not refresh first
PivotTableRefresh "Template", "PivotTable1"
'Select the desired slicer values
SelectMale17Profile
End Sub

There you go!

SelectedProfile

Downloads

A copy of the template file with the macros, a sample output file, and the code used to populate the template file are available for download here as a zip file.

Getting started:

Learn more about ExcelTemplate or try it out in a free trial of OfficeWriter today.

    
 OR     


WEBINAR Feb 22nd: PivotTables in OfficeWriter 8.4

Have you heard? OfficeWriter 8.4 with PivotTable support is here! You’re invited to take a first look at the new PivotTable API within OfficeWriter 8.4 in this interactive webinar.

Our Senior Sales Engineer (and adept demo master), Chad Evans, will walk you through several ways PivotTables can help you wrangle and report on your data. Bring your questions or email them beforehand and we’ll be happy to include them.

When:

Friday, February 22, 2013 at 1 p.m. EST

What we’ll cover:

  • How to use PivotTables to better sort and filter your data
  • How to programmatically create Excel PivotTables in OfficeWriter
  • How to programmatically update existing Excel PivotTables in OfficeWriter
  • Your questions

Spots are limited. Save your seat and register today.


Can’t attend, but still want to learn more? Register anyway! We’ll send the slides and a recording of the webinar after the event.