Category Archives: IT

Windows 8.1 Hyper-V in Review

Credit: TechRadar.com

[Reposted from www.nicolascouraud.com]

Working with developers, I have a love of client-side virtual environments. They allow for snapshots, easy portability of the development environment, and simple and unobtrusive replacement if and when someone blows up their development workstation. When Microsoft announced they were adding client-side Hyper-V in Windows 8, I had high hopes. However, the Windows 8 RTM release of client-side Hyper-V left a lot to be desired from a client-facing solution. It was merely a port of the server-side experience to the client. While it works well for me (I tend to run everything over RDP anyways), for our developers, lack of basic functionality like copy-paste or dynamic window sizing made it DOA.

Thankfully, in the Windows 8.1 (Blue) release, many of these shortcomings have been rectified! The virtual machine connection windows have been redone using the remote desktop engine which means that all of the features you didn’t have before (sound, 3D graphics acceleration, copy-paste), are now available without any workarounds. The full list of features supported in this enhanced session mode are: Continue reading Windows 8.1 Hyper-V in Review

Meet the Team: Nick

Hello and welcome to our Meet the Team series, in which we aim to give you deeper insight into the minds and personalities of those who make up this eclectic, close-knit group. We are developers, marketers, and technical support engineers, and at work we craft everything from Microsoft reporting APIs to mobile email applications. And outside of work? Let’s just say racing against the machine during hackathons, building architecturally sound beer towers during retros, and paddling down the Charles during the warmer months are simply the beginning.

Meet the TeamMeet Nick. Our systems admin and skilled crew champ and cook. While he claims he doesn’t know what’s wrong with your wi-fi (see below), we’re pretty sure he can fix just about anything.

1. What do you do?
I get paid to play with computers? In all seriousness, I’m the systems admin for SoftArtisans, which means I maintain our server infrastructure, build system images, troubleshoot printers, reset passwords, and ensure that our websites stay up.

2. What are you listening to right now?
Lately, I’ve been listening to Spotify quite a bit, but usually I just have the Hype Machine’s popular channel on. It’s a great place to discover artists, and really changed how I listen and think about music over the past few years.

3. If you could build any app, what would it be and why?
Something that lets me execute remote commands from my phone – simple stuff like resetting a password, rebooting a server, restarting a service – that sort of thing. It’d be a huge security hole in any network, but it’d be nice to have when I’m out to lunch and just need to do something quick.

4. When you were 5 what did you want to be and why?
I wanted to be a Marine Biologist because I was fascinated with Robert Ballard (the guy who found the Titanic, the Bismark, and a number of other ships). Sadly, I soon realized that most of them don’t spend all their time hunting for shipwrecks.

5. If you were a beer what would you be and why? Continue reading Meet the Team: Nick

How to tell which Office service pack is installed

A few days ago, I installed the Office 2010 Service Pack 1 and to my dismay, I couldn’t actually tell if it had installed. The version under Program and Features hadn’t changed. There were some really complicated instructions by Microsoft for determining if SP1 had been installed, but then I stumbled across Chris Heacock’s (@chrisheacock) blog post on Verifying 2010 SP1 installations, which saved me so much time.

So here you go, a rehash of how to tell what service pack is installed in Office 2010, along with 2007 and 2003!

Office 2010

  1. Open an Office application, such as Excel or Word.
  2. Go to File.
  3. Go to Help.
  4. On the right-hand side, under Version, there should be a link to Additional Version and Copyright Information. Click that link.
  5. In the About window, you should see the full version (e.g. Microsoft Excel 2010 (14.0.6024.1000) followed by an MSO number. If you see “SP1,” then you have service pack one installed.

2010

Office 2007

  1. Open an Office application, such as Excel or Word.
  2. Go to the Windows icon.
  3. Go to Excel Options (or the equivalent for the application you’re using, such as Word Options).
  4. Go to Resources.
  5. Under Resources will be a section about Microsoft Office Excel 2007 (or Word etc.) Continue reading How to tell which Office service pack is installed

2013 Business Intelligence Trends

Credit: e-bcorp.com

A few weeks ago we posed the question of whether or not Excel had the staying power to be the next great Business Intelligence tool. An overwhelming percentage of readers said yes. This week we decided to delve further into what else is on the horizon for the Business Intelligence arena.

Each year experts and industry leaders make their predictions on what lies ahead on the Business Intelligence landscape. We’ve distilled those predictions down to ones that appeared several times over. Looking at TechTarget, InformationWeek, Forrester, and Tableau Software, we scoped out the top Business Intelligence (BI) trends for 2013 and this is what we discovered.

  1. Cloud BI – The cloud isn’t going anywhere. It still has a lot of attention, despite the reliability, performance, availability, and privacy concerns from your IT department. The cloud’s ability to adjust to larger and larger data sets and petabytes of information makes it attractive for the Business Intelligence arena. TechTarget doubts moving infrastructure to the cloud will become mainstream in 2013, but that it is definitely destined and headed in that direction.
  2. Big Data – Big Data still gets big talk. Forrester predicts a rise in Hadoop-based BI applications, particularly within the mission-critical applications. Along those same lines, Forrester sees Big Data moving out of silos and into enterprise IT. They see enterprise IT becoming more involved with enterprise BI in order to save on the costs it takes to manage Big Data.
  3. Self-Service BI – We’re seeing it with the addition of Powerview to Excel, the desire for people to be in charge of their own data with less of a reliance on IT support to pull information and make business decisions. Forrester cited: Continue reading 2013 Business Intelligence Trends

The Mobile Bandwagon: the BYOD Generation is All In, Your IT Dept Not So Much

VentureBeat Screenshot

Everyone’s jumping on the mobile bandwagon, especially the Bring Your Own Device (BYOD) generation. Advertisers are trying to harness its ability to be in front of this constantly connected audience; developers are trying to build compatible apps every user wants (ahem, shameless plug for Gander); businesses are looking for new ways to best tap into this market. There’s one group, though, that hasn’t overlooked the security challenges and additional costs this new trend brings: your dedicated, behind-the-scenes IT team.

VentureBeat wrote an article last week on the mobile BYOD trend, citing the increase in employees using their personal devices (often more than one device) to access sensitive company information and the frustration of the IT departments.

“A massive majority of companies, 81 percent, now allow employees to bring and use their own devices, and 56 percent of companies have codified that into their corporate guidelines, according to a new study by iPass and MobileIron.”

If you’re like me, you would think having employees use their own devices would lower company costs. However, factor in multiple data plans across multiple devices and things start to get messy. Continue reading The Mobile Bandwagon: the BYOD Generation is All In, Your IT Dept Not So Much

Is Microsoft Excel the Next Great Business Intelligence Tool?

Credit: http://www.pbi2.com/images/img_businessIntel.jpgWith Microsoft’s release of Office 2013now fully equipped with features such as PowerPivot and PowerView, news outlets and blogs are abuzz speculating this is a push to make Excel the next Business Intelligence (BI) tool. Software Advice sat down with Rob Collie, CTO of PivotStream and one of the founding engineers of PowerPivot, to get his perspective on how the new Excel will affect Business Intelligence and Excel professionals.

[Read the full interview here.]

Takeaways from the interview:

1. More adoption of PowerPivot in the Excel community. PowerPivot has yet to receive a lot of attention among the Excel audience. 

“Unlike programmers, BI specialists, and other IT pros, the Excel audience doesn’t congregate at conferences and they don’t closely monitor what Microsoft is saying about the next version of their toolset. Overwhelmingly, the way they learn about new Excel capabilities is by inspecting the latest version once it lands on their desktop.”

All of that is about to change now that Office 2013 has more tightly integrated PowerPivot into Excel. Originally a separate download, PowerPivot is now part of the original package upon purchase.

2. The PowerPivot community is growing.

“Using PowerPivotPro traffic as a guide, I’ve seen the PowerPivot audience double in size every year since 2009. But I’d still estimate that less than one percent of the eventual PowerPivot target audience has been exposed to the product as of today.”

3. All Office users now data analysts? Continue reading Is Microsoft Excel the Next Great Business Intelligence Tool?

Visual Studio Runtime Interop Exception

Recently I was working on a Project in Visual Studio 2008 that has some Web Services in it. Every time I opened the project I would get the error:

System.Runtime.InteropServices.COMException

According to a blog post by Marocanu2001, he was receiving this error because he did not have IIS installed.  However in my case this was not the issue. In my case it was because I was running Visual Studio in limited user mode, and not as an administrator. Without Administration rights, when Visual Studio tries to configure the web services in IIS it will throw this exception.

The solution in short:

  • Make sure IIS is installed on your machine

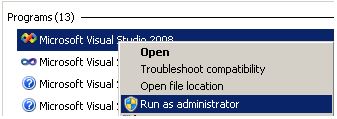
Make sure Visual Studio is run in Administrative mode. (Right-click “Run as Administrator”)


Hope this works for you as well. Happy coding!

Major Upgrades using WiX

Major Upgrades using WiX

Recently one of my colleagues wrote about his experience with WiX, and how he could create a simple installer in fifteen minutes. Today I want to talk about taking your newfound WiX installer to the next level by configuring your WiX installer to perform major upgrades.  In most cases a major upgrade means removing any previous version of an application and installing the new version.

Depending on which version of WiX you are using, you have a couple of options to perform a major upgrade.

Special Considerations:

Special considerations should be made before you start creating your installer. One of the most important ones in my opinion is deciding if your installer will be per-user or per-machine. By default WiX is a per-user install.  If you want your installer to be per machine you can add the following your solution:

<!-- Install at a per-machine level and not per-user -->
<Property Id="ALLUSERS" Value="1"/>

Any upgrade that you make should use a consistent ALLUSERS property. If you decided to change this once your application is already deployed, a major upgrade will not be looking in the same place, and any new version of the installer will not be able to detect the old installed version. This can lead to multiple versions of the software installed on one system.

WiX 3.5.1315.0 and later

In version 3.5.1315.0 of WiX the Major Upgrade Element was introduced, which makes common upgrade scenarios very simple.

It can be as simple as:

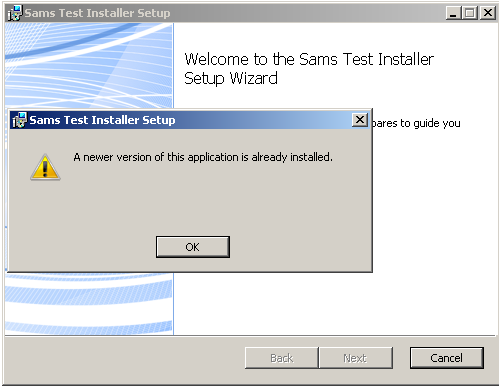
<MajorUpgrade AllowDowngrades="no" DowngradeErrorMessage="A newer version of this application is already installed."/>

If you try to run the installer on a system that already has a newer version you will receive an error with the DowngradeErrorMessage such as:
However if you are indeed installing a new version, then the installer will automatically uninstall the old version and install the new version. How easy is that?!

Pre WiX 3.5.1315.0

If you are using a version of WiX before 3.5.1315.0 then you have to perform a major upgrade in a slightly more complicated way. Seeing as everyone may not be using the newer version of WiX, I think it is still worth explaining.  Note: What defines a Major upgrade is changing the Product Version and Changing the Product ID; just changing the product version will be considered a minor upgrade.

Step  1   Define your GUIDS:

Whenever you are ready to perform a major upgrade you will need to change your product’s GUID. The product GUID is how WiX determines major versions of the product. In my case I am using *, which will generate a new unique GUID every time I build my installer.

  <!-- * means WIX will generate a new GUID -->
	<Product Id="*" Name="$(var.Product.Name)" Language="$(var.Product.Lang)" Version="$(var.Product.Version)" Manufacturer="$(var.Product.Manufacturer)" UpgradeCode="f47c5510-7e95-11e1-8027-bbc14824019b">
		<Package InstallerVersion="$(var.Package.InstallerVersion)" Compressed="yes" Platform="$(var.Platform)" />

Step 2 Define your condition message:

<Condition Message="A newer version of this application is already installed.">
      <![CDATA[Installed OR NOT NEWER_VERSION_FOUND]]>
    </Condition>	

Step 3 Define upgrade table:

The upgrade table tells the installer what the versions it should detect are and how to respond. You will notice that when I detect newer versions, OnlyDetect = “true” because I do not want to replace newer versions of my product.

<!-- Upgrade Table -->
    <Upgrade Id="f47c5510-7e95-11e1-8027-bbc14824019b">
      <UpgradeVersion
        Property="OLD_VERSION_FOUND"
        Minimum="1.0.0.0"
        Maximum="$(var.Product.Version)"
        IncludeMinimum="yes"
        IncludeMaximum="no"
        OnlyDetect="no"
        IgnoreRemoveFailure="yes"
        MigrateFeatures="yes"
        Language="1033"  />

      <UpgradeVersion
        Property="NEWER_VERSION_FOUND"
        Minimum="$(var.Product.Version)"
        IncludeMinimum="no"
        OnlyDetect="yes"
        Language="1033"  />
    </Upgrade>

Step 4 define the Install Execute Sequence

    <!--Removes the old version and then installs the new version-->
    <InstallExecuteSequence>
      <RemoveExistingProducts After="InstallInitialize"></RemoveExistingProducts>
      <InstallExecute After="RemoveExistingProducts"></InstallExecute>
    </InstallExecuteSequence>

And that’s it. I hope this helps others who are looking to perform major upgrades with their WiX installers. If you are working a lot with WiX, I recommend you check out the book WiX: A Developer’s Guide to Windows Installer XML  by  Nick Ramirez
Creating a Virtual Machine in SCVMM Self-Service Portal v1

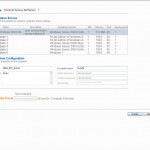
System Center Virtual Machine manager ships with an addon called the Self-Service Portal. The goal of the Self-Service portal is to provide a hassle free method for end users to create and manage their own virtual machines in Hyper-V. Below are the instructions and screenshots an end user would use to create a virtual machine in v1 of the Self-Service portal that shipped with System Center Virtual Machine Manager 2008 R2.

These steps assume that you have Self-Service portal running in your environment and that you have already created SCVMM templates for users to deploy.

How to Create a virtual machine in the Self-Service Portal

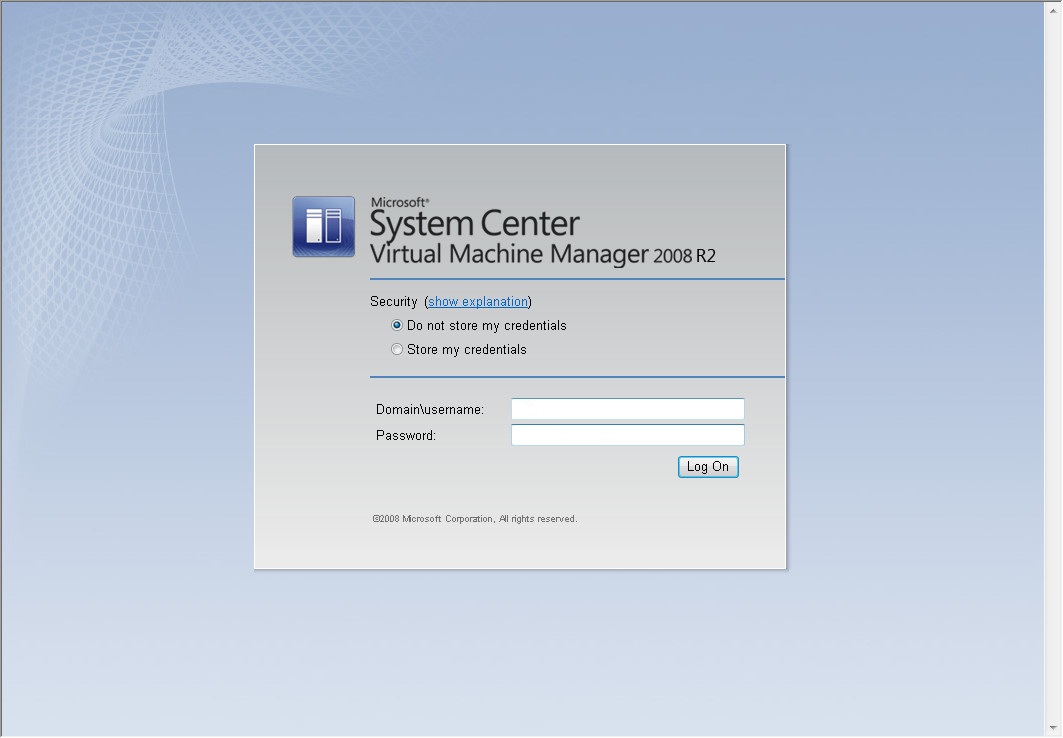
  1. Log in to the Self-Service Portal.
  2. Under the Create menu, click New Computer.
  3. Under the Creation Source, choose a Template from the available list.
  4. Enter the display name and description of the virtual machine.
  5. Enter the computer name (this will be the name referenced on the network). Be wary of adding a trialing space in the computer name or it will fail to create.
  6. Click create, if successful a pop up should indicate the virtual machine was created successfully.
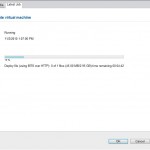
  7. Wait for the virtual machine to be deployed to the host. You can view the estimated completion time from the properties -> latest job tab.
  8. Connect to the virtual machine.

Screenshots


Additional Tips

  • Configure your template or use group policy to make your virtual machines accessible over RDP. The connection method used in the Self-Service Portal is difficult to use. It requires a Active X control be installed on the client and is genrally inferior to RDP (fixed screen size, no copy paste, etc..).
  • Use a naming convention to track virtual machines created (i.e. hv-xx) through the Self-Service Portal. Internally, we created a small ASP.NET web application that will automatically generate a virtual machine name for users when they click a button.


Better living through user scripts

The best feature of the web is the fact that once a page is served to your client, it’s yours.  There’s no such thing as a closed-source web page, only one that you haven’t looked at.  Better yet, any reasonably modern browser can inject your custom CSS and javascript into a web page after it’s been downloaded, to extend or enhance it any way you see fit.  As a celebration of the open web, here are three client-side additions to JIRA’s Greenhopper that I wrote to make my daily life better.

Don’t Resolve Tasks

Our Greenhopper workflow deals mostly with Stories and Tasks.  Both of those are stored as JIRA issues, so they can both be either Closed or Resolved.  The way we do things, it doesn’t make sense to Resolve a task, only ever Close it.  This short bit of CSS will remove the option to Resolve a task when it gets dragged into the Done column:

.aui-popup .gh-aui ul li
{
  display:none
}
.aui-popup .gh-aui ul :first-child
{
  display:inline-block
}

Highlight Tasks By User

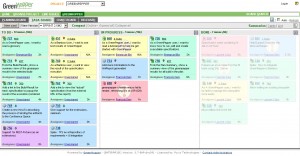
Greenhopper sets different colors on different issue types.  This is nice, but I realized that what I really want is to be able to quickly distinguish tasks by who’s working on them, rather than what they are.  The following javascript will run through the Task Board and assign classes to each subtask based on who’s assigned to it (and run again whenever the page updates from dragging an issues):

function addClasses() {
    var subtasks = document.getElementsByClassName("gh-issue");

    for (var i = 0; i < subtasks.length; i++) {
        var issue_body = subtasks[i].children[0].children[1];
        var assignee = null;
        for (var j = 0; j < issue_body.children.length; j++) {
            if (issue_body.children[j].getAttribute('data-fieldid') == 'assignee') {
                assignee = issue_body.children[j].innerText.replace(' ', '').replace('\n', '').toLowerCase();
            }
        }

        if (assignee != null && subtasks[i].children[0].className.indexOf(assignee) < 0) {
            subtasks[i].children[0].className += " " + assignee;
        }
    }
}

document.addEventListener("DOMNodeInserted", addClasses);
addClasses();

Once that’s in place, I can add a little CSS to style different users.  For example, this turns all issues assigned to me green and bold:

div.gh-issue-inner.seankermes {
  background-color:#384 !important;
  font-weight:bold;
}

Colored Columns

Our Greenhopper task board has five columns at the moment, and there’s enough issues in it that when I scroll down past the column headers I can lose track of which issues are in which column based solely on their position.  This script sets the background color of each column section in the task board to a different color to make it easier:

function colorColumns() {
    var colors = ["#e0e0d7", "#cca36e", "#614a48", "#f5e1a4", "#99948b" ]
    var cols = document.getElementsByClassName("gh-step-col")
    for (var i = 0; i < cols.length; i++) {
        cols[i].style.backgroundColor=colors[i%5]
    }
}
document.addEventListener("DOMNodeInserted", colorColumns);
colorColumns();

All the code here can be installed in your very own browser either by default (Chrome handles .user.js files as extensions) or with browser add-ons like Stylish and Greasemonkey