Tag Archives: OfficeWriter

VP of Development Talks PowerPointWriter

[Updated February 26, 2014]

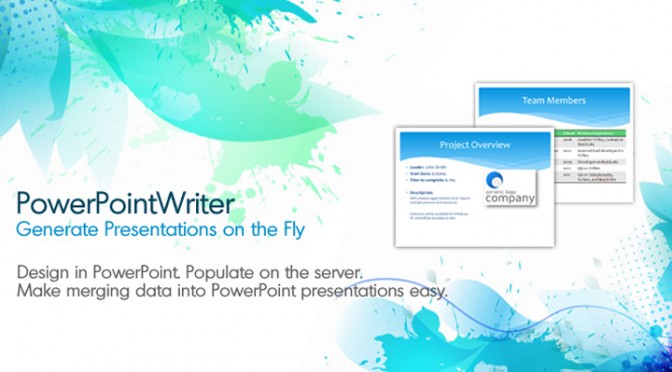
We just launched PowerPointWriter, a new tool to save companies time on generating PowerPoint presentations with their own data, through their own applications. What is it exactly? How does it work? Why would you use it? We asked our VP of Product Development (and PowerPointWriter enthusiast), Sam, to give us a look at what makes this tool something to write home about.

sam_profile

1. What is PowerPointWriter?

PowerPointWriter is a tool that allows developers to combine their data from each of their data sources with PowerPoint files. This means that the PowerPoint files and presentations you generate will always have the most up-to-date data.  Just imagine being able to generate that weekly sales presentation for your boss every Monday morning with the newest data pulled fresh from the database.

2. What has you most excited about launching PowerPointWriter?

This has been a request from our customers for some time now. One of the things our customers always tell us is that they love our template-based approach to generating Office documents, and wanted this same ability with PowerPoint. So we did just that.

With PowerPointWriter’s template approach you can have things like dynamic images, tables, lists, and slides in as little as 10 lines of code.

3. What is your favorite feature being introduced?

This is definitely our RepeatSlide. Many times you are importing a dynamic set of data and the size will change. With RepeatSlide you can easily create a template file with only one slide in it, and have the slide repeat automatically to accommodate your data. For instance, you might have 100 rows of data and PowerPointWriter will automatically create 10 slides for you. Then, if your data grows to 200 rows, PowerPointWriter will create 20 slides for you automatically, and everything on your slide will be preserved!

4. Can you give us a few scenarios in which customers can use this product?

PowerPointWriter is really good at Mail Merge types of scenarios. For instance:

If you are all business:

Any type of pitch deck would be a great use case. Maybe you want to show your up-to-date sales numbers to stakeholders, management, or investors. You could make Score Reports using PowerPointWriter formulas, or certificates of completion for a course all of your employees were required to take.

If you are all fun:

Maybe you just want to show your mother-in-law photos from that vacation you didn’t invite her to (just kidding, I love my mother-in-law).

Why limit yourself? You can check out the samples page for more ideas.

5. What problems does PowerPointWriter solve?

PowerPointWriter allows you to get your data from virtually any data source, and put it into a file format that is familiar to your users. Continue reading VP of Development Talks PowerPointWriter

Excel Charts Don’t Follow “Move and Size with Cells” Option

Problem

Excel’s “Move and Size with Cells” option allows you to automatically re-size charts if the cells that contain the chart are added or re-sized.

With ExcelWriter, when the “Move and Size with Cells” option is selected in Excel, charts are not re-sized based on rows that are added from data being imported into data markers using the ExcelTemplate object (or OfficeWriter’s SSRS integration). Charts are re-sized if rows are added explicitly using Worksheet.InsertRow.

Example 

The pictures below show a file that has “Move and Size with Cells” option selected, before and after it has been processed by ExcelWriter.

Template

KB_ChartExample1

Incorrect output – Note that the chart remained the same size as before the data was imported.

ExcelWriter Chart

The correct output should look like the following:

ExcelWriter Chart Continue reading Excel Charts Don’t Follow “Move and Size with Cells” Option

How to Use the LineBreakstoParagraphs Property

The LineBreakstoParagraphs Property

A new feature in the WordWriter 8.6.1 WordTemplate Object is the ability to output new paragraphs where there are line breaks in your data using the LineBreakstoParagraphs property. This allows the user to have their text separate into new paragraphs every time there is a line break. The biggest benefit of this feature is that each new paragraph that is inserted will inherit the paragraph styles of its MergeField, including hanging paragraph settings, indentations after paragraphs, alignment, spacing, and orientation, to name a few. This means a single merge field can now output many identically formatted paragraphs rather than a single, large paragraph.

How to Use

By default, LineBreakstoParagraphs is set to False, and line breaks are inserted as soft breaks. A soft break is when text goes to the next line, but is still a part of the previous paragraph. Therefore the new line lacks any typical spacing and indentation that would occur between paragraphs. A soft return can be done in Word by pressing Shift + Enter. To use LineBreakstoParagraphs, you must set the property to true before calling Open(). Also be aware that this property only works on OOXML Word documents (.docx, .dotx, etc).

Comparison

LineBreakstoParagraphs Set to FALSE (DEFAULT)
 KB_LB1
LineBreakstoParagraphs Set to TRUE
KB_LB2

Sample Code

// Names of your mergefields
string[] NamesArr = { @"MultiLineString" };

//Your long multi-line string of text with linebreaks.
object[] ValuesArr = {  
@"Lorem ipsum .... 
Mauris ac elit ... 
Cras mi nisi....};

WordTemplate WordTempl = new WordTemplate();

//Set LineBreakstoParagraphs to true
WordTempl.LineBreaksToParagraphs = true;

WordTempl.Open(Page.MapPath("/LineBreakstoParaDemo.docx"));

//Set the datasource to the arrays.
WordTempl.SetDataSource(ValuesArr, NamesArr);
WordTempl.Process(); 
WordTempl.Save(Page.Response, "Demo.docx", false);

Creating Dynamic Links With MergeFields in Microsoft Word

Introduction

MergeFields allow users to import dynamic content in Microsoft Word. While this feature is very useful in many situations, it can be unclear how you must handle MergeFields nested inside of fields like hyperlinks. A user might want to have both dynamic link test and destinations for their hyperlinks. Unfortunately, how to achieve this is unclear because Hyperlink field codes only take a destination parameter. There is no place to put a merge field for your dynamic display text. In this article, I will show how to create fully dynamic links for Microsoft Word 2007 and up!

Step 1: Adding a Hyperlink Field

  • Put your cursor where you want to place the hyperlink
  • Go to Insert->Hyperlink
  • In the dialog box:
    • Next to Text to Display, enter something like “Temp Display Text”
    • Next to Address, enter something like “Temp Link”

You Should Now Have Something Like This:

KB_Step1

Step 2: Adding a Dynamic Destination Location

  • Press ALT+F9 to see the field code.
  • Delete the “Temp Link” text inside of the quotes.
  • If you have a base url location, enter it in between the quotes. Then proceed to the next step.
  • Now we must add a MergeField to get dynamic urls.
    • Put your cursor before the closing quote of your destination location.
      • Go to Insert-> Quick Parts-> Field.
      • Select MergeField from the Field Names menu.
      • Add the Field Name to identify the MergeField.
      • Click “OK” to exit the dialog.

You Should Now Have Something Like This:

KB_Step2 Continue reading Creating Dynamic Links With MergeFields in Microsoft Word

Can I Print ExcelWriter Generated Files from the Server?

Problem

I am trying to print ExcelWriter generated files. What are my options?

Solution

ExcelWriter does not currently support printing directly from the server.  In order to print, the contents of the Excel file must first be rendered. As ExcelWriter does not currently have the ability to render content, rendering is handled by Excel when the output file is opened by the client. This means that in order to support printing directly from a web server it would be necessary to have Excel on the server. However, having Excel on a web server is not recommended.

There are two workarounds that we recommend to meet your printing needs:

  • Save files to a dedicated printing server
  • Automate printing using a VBA macro, when the file is opened on the client

The ability to render Excel files is being planned for a future release of ExcelWriter.

Setting Print Options

Before printing you can set all your print options programatically through ExcelApplication.      Example code is below: Continue reading Can I Print ExcelWriter Generated Files from the Server?

What to Do When OfficeWriter Sporadically Throws “General license key exception: Product key not installed.” Error

Problem

Even though the license key is in the registry, OfficeWriter sporadically throws the error “General license key exception: Product key not installed.” on Windows 2008 or above.

This issue has been reported by certain customers running a custom identity on an application pool in IIS 7 or above.  Most commonly this behavior has been seen on applications in 32-bit application pools, but has also been reported with 64-bit applications.

The combination of several factors in IIS 7.5 and Windows 2008 can cause problems for application pools running under a custom identity if they need to read from the registry.  These factors may be responsible for the sporadic OfficeWriter error.

  1. Windows 2008 introduced application pool identities.
  2. Windows 2008 also added new functionality to the user profile in Windows 2008 that causes the OS to more aggressively clean up registry handles when they are not needed.
  3. Additionally, IIS 7 and above does not load the user profiles by default.

Troubleshooting

If you are receiving the “General license key exception” sporadically, changing the ‘Load user profile’ setting in IIS may resolve the issue.

The ‘Load user Profile’ setting

In IIS 7 and above, there is an application pool setting called ‘load user profile’.  When this is set to true IIS will load the user profile for the application pool identity.  This should keep Windows from cleaning the registry handles necessary for OfficeWriter to read the license key.

To set ‘load user profile’ to true:

  1. Open the IIS Management Console.  This can be done by going to Run and typing in inetmgr
  2. Open the Application Pools window by clicking View Application Pools on the Actions pane, and select the Application Pool you want to configure.
  3. Right click the Application Pool and select “Advanced Settings…”
  4. Under the Process Model menu, change ‘Load User Profile’ to true.


Next Steps

If you find that the “General license key exception’ error still occurs after setting the ‘Load user profile’ setting, please contact OfficeWriter support.


Note:  If you are receiving the  “General license key exception: Product key not installed.” error consistently, it is likely that the license key is not installed properly.   Instructions for installing OfficeWriter license keys can be found at httpblog.softartisans.com/tag/how-to-add-a-license-key/


Can ExcelWriter Handle Formulas with External References?

Problem

External references are references to a cell or range on a worksheet in another Excel workbook, or a reference to a defined name in another workbook.

ExcelWriter does not currently have the ability to parse formulas with external references. External references in formulas will cause ExcelWriter to throw an “Unable to parse formula: Error: Could not match input” error.

Solutions

Depending on how the formulas are being used, there are two workarounds to handle external references.

Solution 1: Avoid making API calls that would cause the formulas to be parsed

The ability to delay the parsing of formulas was added in ExcelWriter version 8.5.1.  Before this version, ExcelWriter parsed every formula in a worksheet automatically.  In 8.5.1 and later versions, formulas are only parsed if it is necessary. This means that as long as there are no calls in your code that would require ExcelWriter to parse the formulas, the formulas will be preserved. Calling CopySheet, or inserting or deleting sheets, columns, or rows will all cause ExcelWriter to parse the formulas.

Solution 2: Excel’s INDIRECT Function

If you need to set a formula programmatically or use methods that would cause ExcelWriter to parse the formulas with external references, Excel’s INDIRECT function can be used with the formula string passed as a parameter. For example:

wb.Worksheets[0].Cells[0,0].Formula = "+INDIRECT(\"'C:\\Temp\\[Book2.xlsx]Sheet1'!A1\")";

ExcelWriter will generate the correct ourput when the INDIRECT function is used. However, in order for the external reference in the formula to take effect, the source workbook needs to be open as well. If the source workbook is not open, the cell’s value will display “invalid cell reference error (#REF!)” Continue reading Can ExcelWriter Handle Formulas with External References?

Why Do Some Blank Cells Return Different Values in OOXML?

Problem

Some blank cells in OOXML file formats return an empty string, while other blank cells return null.  The same file in BIFF format returns only null values.

This problem occurs because OOXML (.xlsx /.xlsm) preserves any empty strings in cells when the file is saved.  When saving a file in BIFF (.xls) any cells containing an empty string will be set to a null value.

This can be a concern for users switching to the OOXML file formats. Code that checks worksheets for null values may need to be amended to account for the change in behavior.

Example 


The following code illustrates how this discrepancy might affect users:

           ExcelApplication xlapp = new ExcelApplication();
		   Workbook wb = xlapp.Open("SampleFile.xlsx")  
		   Worksheet ws = wb[0];

		   //Trim a range of cells. 
		   //Because A1 is empty, its value will be 'empty string' after trimming.
		   for(int i = 0; i<= 20; i++)
           {
		   	  for(int j = 0; j<= 20; i++)
              {
                  string value = (string)ws.Cells[i, j].Value;
				  ws.Cells[i, j].Value = value.Trim();
              }
           }

 		   //Save and reopen the file in the OOXML format
           xlapp.Save(wb, Directory + "SampleFile.xlsx");
           wb = xlapp.Open(Directory + "SampleFile.xlsx");
           ws = wb.[0];
           if (ws.Cells[0, 0].Value == null)
            {
               // This code would be reached in .xls
			   // but not in .xlsx  
            }

Users who currently check for cells containing null values may find that their code produces unexpected results when switching to OOXML files.


Solution

In order to ensure that code will return correct results when dealing with blank cells, it is important to use logic that handles all possible values.  There are 2 ways that we suggest implementing this logic.

Solution 1 – Use IsNullOrEmpty when checking for blank cells

Use logic that checks whether a cell is either null or an empty string.

Example:

            if(string.IsNullOrEmpty((string)ws.Cells[0, 0].Value))
            {
               //With this new logic, it could be either file format
                ws.Cells[1, 1].Value = "This is a .xls or an .xlsx file";   
            }

Solution 2 – Keep empty string values from being assigned to cells

Check if a cell is null before performing any operations that would assign an empty string value to a null cell.

Example:

           //Check that the cell is not empty before trimming
           if( ws.Cells[0,0].Value != null)
           {
                  string value = (string)ws.Cells[0, 0].Value;
				  ws.Cells[0, 0].Value = value.Trim();
           }
Related Information:

If your worksheet contains formulas, best practice would be to check the cell for formulas as well. More information on how to check for empty cells can be found here.


Creating Holiday Cards and Other Unexpected OfficeWriter Projects

Last week, our VP of Development Sam and Senior Sales Engineer Chad were challenged to look at different ways to use OfficeWriter. The result? They put together a project designed to keep you in touch with your friends and family this holiday season. They looked at using OfficeWriter’s mail merge feature in a new way. Plus, they took that one step further, looking at how the technologies from this project can be applied to business applications within your company. Before heading home for the holidays, take a little inspiration from this behind-the-scenes video of unexpected ways to use OfficeWriter in building your reports and company documents.

Read the original post, get the code, and take a behind-the-scenes tour of the technologies it runs on.

Embedly Powered

via Vimeo

Want to get straight to the point? Skip to the end of the video to discover how this project could be applied to your business.

How to Use Worksheet Protection Properties In ExcelWriter

How to Use Worksheet Protection Properties In ExcelWriter

In ExcelWriter 8.6.1, the ability to set specific worksheet protection properties was added with the new Sheet Protection Object. Worksheet Protection Properties allow the user to add permissions to do certain actions on protected worksheets.

The Excel Protection Properties

Excel Worksheet Protection Property ExcelWriter SheetProtection Object Property
Select Locked cells SheetProtection.AllowSelectLockedCells
Select Unlocked Cells SheetProtection.AllowSelectUnlockedCells
Format Cells SheetProtection.AllowFormatCells
Format columns SheetProtection.AllowFormatColumns
Format Rows SheetProtection.AllowFormatRows
Insert Columns SheetProtection.AllowInsertColumns
Insert Rows SheetProtection.AllowInsertRows
Insert Hyperlinks SheetProtection.AllowInsertHyperlinks
Delete Columns SheetProtection.AllowDeleteColumns
Delete Rows SheetProtection.AllowDeleteRows
Sort SheetProtection.AllowSort
Use Autofilter SheetProtection.AllowUseAutoFilter
Use PivotTable reports SheetProtection.AllowUsePivotTableReports
Edit Objects Not Supported by ExcelWriter
Edit Scenarios Not Supported by ExcelWriter

Protection Properties Limitations

Microsoft Excel has a limitation on four of the protection properties: AllowSort, AllowDeleteColumns, AllowDeleteRows, and AllowInsertHyperlinks. These properties require that affected cells be editable when the worksheet is locked. This is because these properties entirely remove cells or alter the content of cells that are protected. Therefore, in order to use the properties you must unlock cells, put cells in an editable range, or use a macro.

Using the Protection Properties in Excel Writer

Steps to Use Protection Properties in ExcelWriter: 

  1. Create a new sheet protection object
  2. Set the worksheet protection properties as desired. By default, Select Locked cells and Select Unlocked Cells are set to true
  3. Call Protect() on the worksheet Continue reading How to Use Worksheet Protection Properties In ExcelWriter