Introduction
In previous blog posts, I showed how José and Jillian, salespersons with PostOne Bicycles, used the new %%group marker to group and nest hierarchical data from a flat data set. In this tutorial, they will expand upon the concept by introducing headers to help separate each group, using the %%value() marker to show data values in headers and the (hide) modifier to hide data that is already shown in a header.
If you’re not a current ExcelWriter user, you can download a free evaluation and follow along!
Setup
This tutorial uses the same code and data as the original blog post. The template used in this tutorial starts where the previous blog post left off.
Adding Headers
Headers in ExcelWriter grouping and nesting are repeated for every new value in a grouped column. José marks the beginning of a header block is by using a %%header marker; the block is marked by the next %%header block (if you have nested headers) or the data marker row, as in this case.
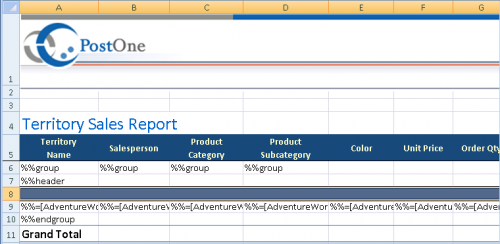
In the following template, José has inserted a simple row of blue cells as the header for the Territory Name group so that he can easily see where one territory ends and another begins:
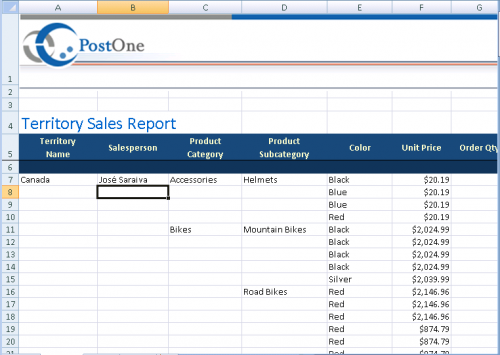
When it is processed using the ExcelTemplate object, a row of blue cells now separates each Territory Name block:
Using the %%value marker
While José is satisfied with separating the different regions from each other in nested output, Jillian wants to see the names of the territories in the headers.
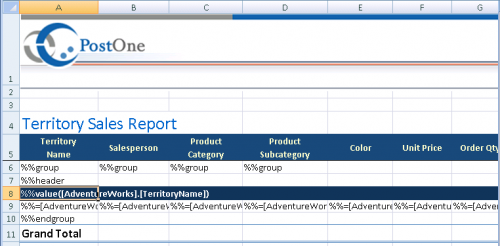
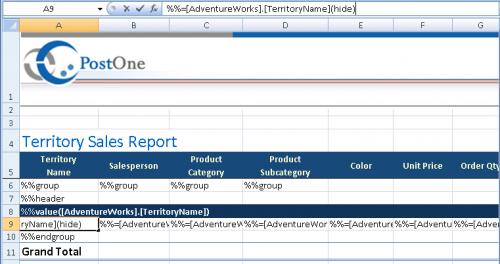
Static text within the header will be repeated unchanged for every header, which would not allow Jillian to achieve her goal. However, she dynamically adds data from the data rows to the headers using the %%value() data marker. In the example below, Jillian places each Territory Name in the header for each Territory Name by placing %%value([AdventureWorks].[TerritoryName]) in the header. The text within the %%value() marker is the data marker that is displayed, without the “%%=”:
Each header now features the Territory Name of its group: 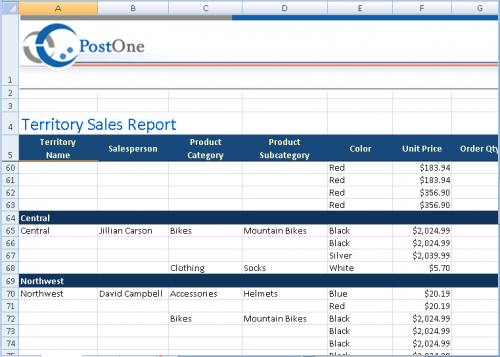
Using the (hide) data marker modifier
In the example above, Jillian to placed the Territory Name values in the header using the %%value marker. However, the Territory Name values are repeated still in the data rows. Jillian hides the repeated values in the data marker row by appending the (hide) data marker modifier to the end of the %%=[AdventureWorks].[TerritoryName] data marker in the data marker row:
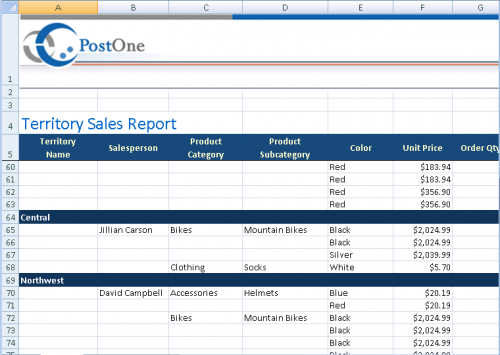
When the data is bound to the template, the Territory Name field is omitted from the data rows, while it is preserved in the headers:
Nesting Headers
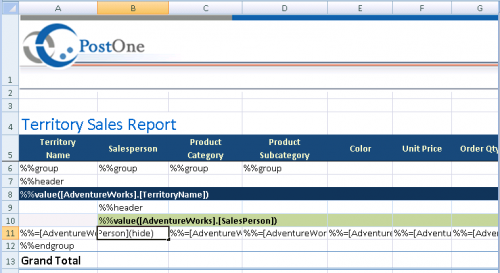
As in my last post, Jillian pushes further with the feature set of ExcelTemplate grouping and nesting, this time by using headers for nested fields. She adds a %%header marker to the Salesperson field by placing it directly below the Territory Name header and in the same column as the %%=[AdventureWorks].[Salesperson]. The header has a green background and includes the value of the field. She also removes that value from the data rows using the (hide) data marker modifier:
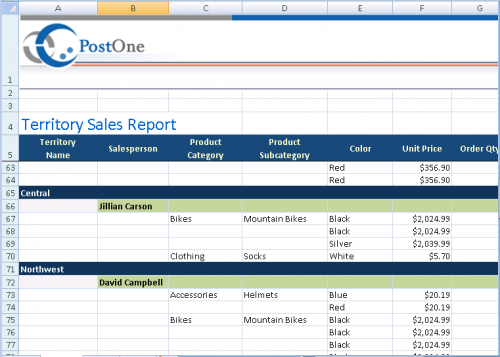
When the template is filled, the Salesperson headers are repeated for every Salesperson within their corresponding Territory groups, making it easier to see each Salesperson’s sales within each territory:
 Follow