Category Archives: Excel

Run-time error 1004 with PivotItems

I was working on some VBA code to hide all the values for a particular report filter, except for a specific one. The code looped through all the pivot items for a particular field, turned them off and then turned the one I wanted back on.

Sub SetFilter(ByVal Worksheet As String, ByVal pivotTable As String, ByVal pivotField As String, ByVal selectValue As String) 
      Sheets(Worksheet).Select 

      Dim pvtTable As pivotTable
      Set pvtTable = ActiveSheet.PivotTables(pivotTable) 

      Dim pvtField As pivotField 
      Set pvtField = pvtTable.PivotFields(pivotField) 
     For Each filterValue In pvtField.PivotItems 
          filterValue.Visible = False 
     Next 
     pvtField.PivotItems(selectValue).Visible = True 
End Sub

While testing the code, it worked until it hit the last filter value, at which point it would throw an exception: Continue reading Run-time error 1004 with PivotItems

PowerPivot Part 4: Sharing PowerPivot Workbooks

So now you have a PowerPivot workbook that’s far too awesome to keep to yourself. How do you go about sharing PowerPivot workbooks?

You could just distribute the workbook wholesale, but that’s not optimal because any user who wants to take advantage of the PowerPivot features needs to have PowerPivot for Excel 2010 installed on their machine to fully run the report.

Where else can you turn?

Luckily, SharePoint 2010 introduced PowerPivot for SharePoint that is comprised of two main pieces:

  • Server software that can retrieve the data for the report
  • The PowerPivot Gallery

The SharePoint PowerPivot Gallery is a special document library that has document management and preview for PowerPivot workbooks (along with a few other document types). With the PowerPivot Gallery’s live preview, you can interact with a PowerPivot workbook, just as you would in Excel.  You can also create workbooks from published PowerPivot workbooks and schedule data refreshes for added versatility. The gallery also has several customization options for how the reports are listed.

What’s the catch?

Continue reading PowerPivot Part 4: Sharing PowerPivot Workbooks

PowerPivot Part 3: Slicers

Hello everyone, Pitan here! This is the third chapter of my PowerPivot epic. Read the adventure from the beginning with PowerPivot Part 1: Bringing Data Together or continue on to your regularly scheduled programming with slicers!

Okay, so technically slicers aren’t specific to PowerPivot, but they are new to Excel 2010. Chances are if you are working with PowerPivot, you’ll want to know about slicers.

What is a slicer?

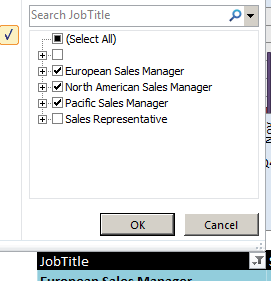
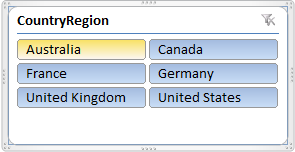
A slicer is a visual representation of a filter applied to your PivotTable or PivotChart. Rather than having to use the drop-downs for report filters, column labels, or column rows like this:

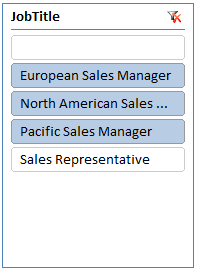
You can have an aesthetically pleasing slicer to show you at a glance what data is filtered:

How do slicers work?

Continue reading PowerPivot Part 3: Slicers

PowerPivot Side Quest: How to Format a Slicer

Pitan here! In Part 3 of my PowerPivot blog series, I cover how to add slicers to a PowerPivot report.
This post covers how to format slicers in Excel 2010 – in particular, how to create a custom slicer style that can be applied to multiple slicers.

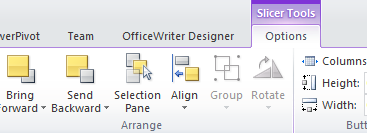
The first step is to select the slicer to activate Slice Tools tab in the ribbon.

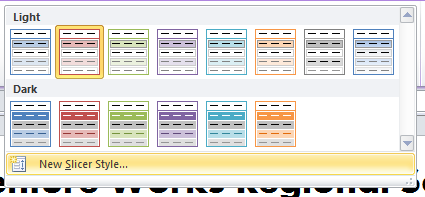
There are default styles available, but in this case we want to make a customized slicer style. You can create a new style from scratch:

But you may find it easier to clone the style and then modify the style properties, which is what we will do in this example. Here is the slicer with the unmodified clone of the style:

Continue reading PowerPivot Side Quest: How to Format a Slicer

Creating Dynamic Menus in VBA Add-Ins

With the new release of OfficeWriter 8.1’s designer ribbon, I’ve been working more with the ribbon interface. This is a follow up post to one written previously on updating an old Office Add-In to use the new ribbon interface. In this post we’ll explore how to create dynamic menus in VBA Add-Ins.

Once you have the ribbon for a VBA Add-In, there are a number of things you can add to make the UI more useful.  One of the more versatile elements available is the dynamic menu.  This menu lets you change it during runtime!  Unfortunately, working with it in VBA is a little strange.

First add the base xml to the ribbon xml like you would for any UI element.


<group label=”Ribbon Group” id=”group1”>

<dynamicMenu label=”Dynamic Menu” id=”menu1″
imageMso=”TableInsert” getContent=”ReloadMenu”/>
</group>

The important attribute here is “getContent”.  This is a callback to a method in the VBA which will create the items for the menu.  The method will literally create xml for a menu from scratch and return it.  Anything that can normally be in a menu can be added this way – including buttons, submenus, and separators.  The sample code below creates a button and a submenu with another button inside it. Continue reading Creating Dynamic Menus in VBA Add-Ins

PowerPivot Part 2: Copying PivotTable Functionality

Pitan here! This is Part 2 of my series on PowerPivot, which started with looking at how PowerPivot handles data. This time we’re covering similarities and differences between PowerPivot and regular PivotTables.

PowerPivot offers all the existing functionality of PivotTables with stronger backend support for data sources. Most of PowerPivotTables is exactly the same as regular PivotTables, but there are a few minor differences. So rather than tell you how to create PivotTables with PowerPivot, since you should theroretically be able to reuse your existing PivotTable know-how, I’m going to focus on some of the differences that threw me for a loop.

Refreshing Data

If you’re familiar with PivotTables, then you probably know that if you make changes to the original data for your PivotTable, you have to refresh the PivotTable in order to see those changes take effect.

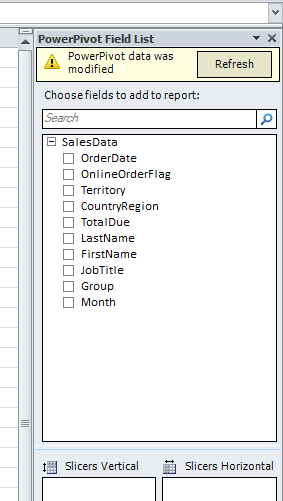
PowerPivot is no different, except that it’s a bit more explicit. When you refresh the data in PowerPivot for an existing PowerPivotTable, the PowerPivot field dialog will tell you that the PivotTable also needs to be refreshed.

It’s easy to forget that refreshing PowerPivot doesn’t refresh everything, but at least Excel constantly reminds you.
Continue reading PowerPivot Part 2: Copying PivotTable Functionality

Comparing Excel Export Functionality in SSRS 2012 to OfficeWriter

In the latest version of SQL Server, SQL Server 2012, Reporting Services now supports the Office 2007\2010 XLSX file format (aka Office Open XML file format) in its Excel renderer. In fact that is the default format for the Excel renderer. The old renderer for the legacy Excel 2003 XLS format has been named to “Excel 2003” but it has been deprecated and is not visible in the available export options list by default. For reference see the related section in the MSDN documentation. Although SSRS 2012 has now the ability to export an RDL report into an Excel XLSX workbook, the Excel renderer still has certain limitations. In this blog post, we will discuss some of these limitations and compare them to the OfficeWriter renderer in SSRS.

Charts

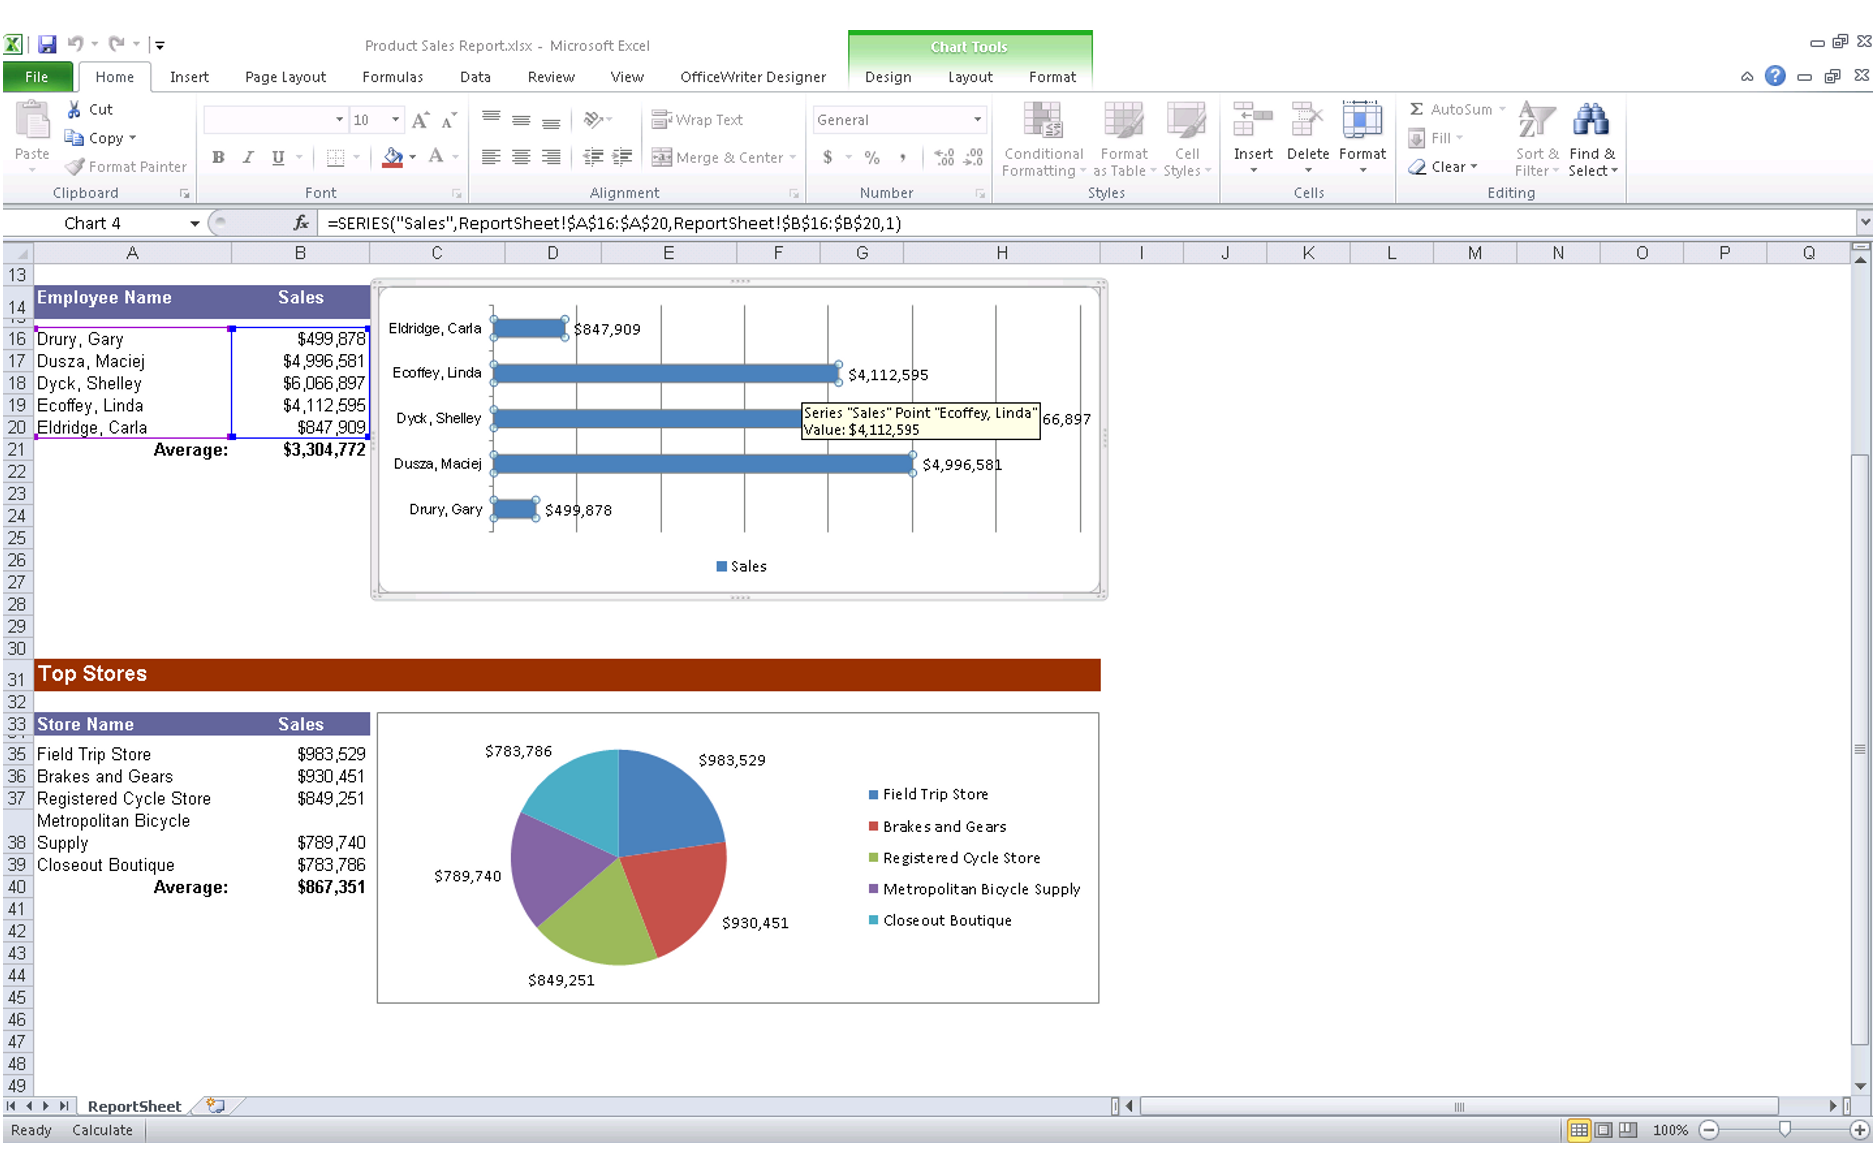
Probably one of the major limitations is that charts will be exported as pictures. In the related section in the MSDN documentation it states:

“Charts, sparklines, data bars, maps, gauges, and indicators are exported as pictures. The data they depict, such as the value and member labels for a chart, is not exported with them and is not available in the Excel workbook unless it is included in a column or row in a data region within a report.”

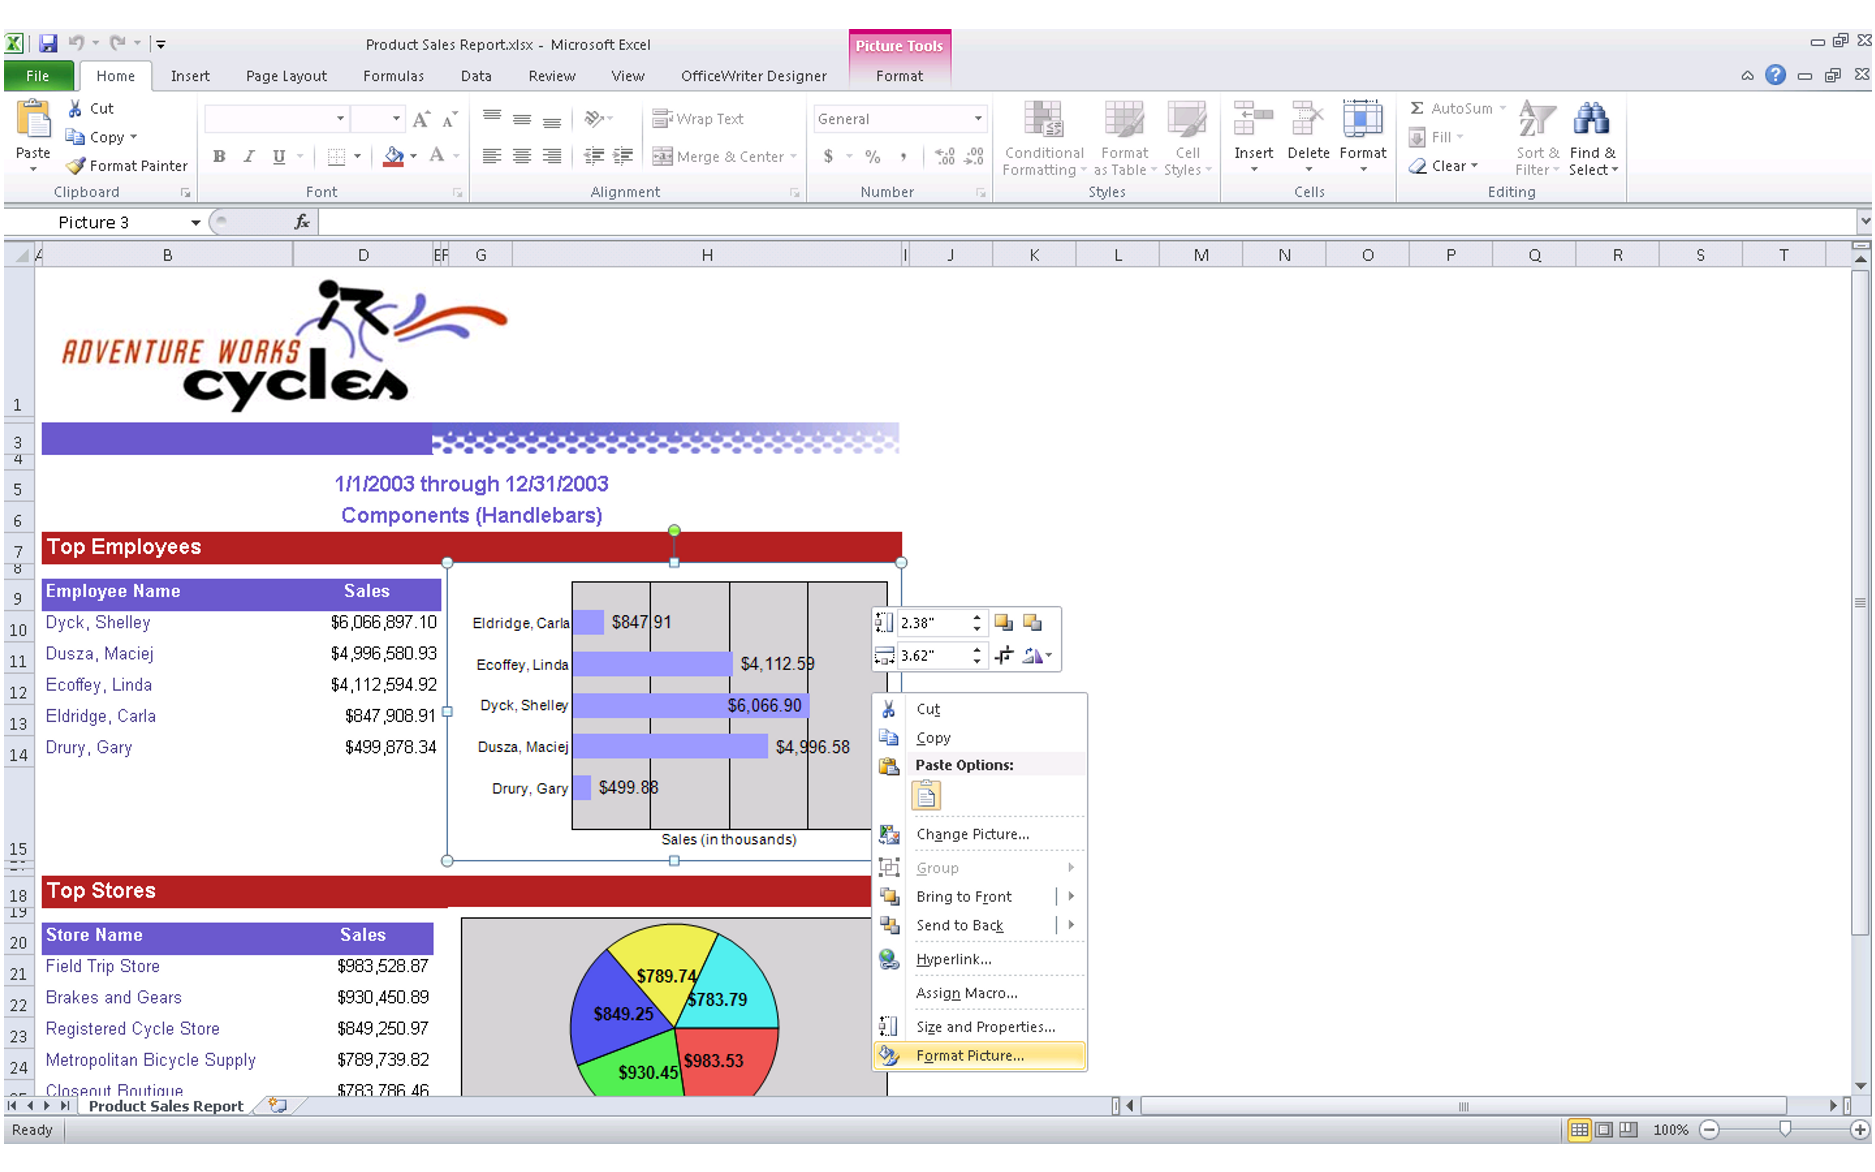
With the OfficeWriter renderer on the other hand, the charts will be native Excel charts with live data. Let’s see the difference in the following screenshots:

“Product Sales Report.xlsx” generated using the SSRS 2012 Excel renderer (note that the chart is a picture)

Continue reading Comparing Excel Export Functionality in SSRS 2012 to OfficeWriter

PowerPivot Part 1: Bringing Data Together

Hello everyone, Pitan here! I’ve finally had the chance to get my head around PowerPivot, the new Excel 2010 add-in for grabbing, pivoting, and displaying data. The chronicles of my journey to set up my own PowerPivot report will be revealed in a series of blog posts over the coming weeks. Tune in as I give you some HOW-TOs with a healthy dose of side commentary!
Continue reading PowerPivot Part 1: Bringing Data Together

Super Short Tips: Working with pivot tables in VBA

Sometimes you just need to write macros for pivot tables. It’s a fact of life.

Maybe your pivot table is dynamically populated with data and you need to make some custom changes once the data is in the table, but you can only do that after the file is opened in Excel and the pivot table refreshes. Perhaps your plagued with the error that happens when you open a file with a pivot table directly from Internet Explorer. Whatever your reason, you need to write some VBA for pivot tables.

Here’s my super short list of tips for working with pivot tables in VBA:

#1 – Record a macro of yourself to get started

If you know what you want to do, but you’re not sure what the VBA code should be, record a macro of yourself doing the desired action. Not only will this give you a hint about where to start in your VBA, but you’ll also verify the exact method calls for your version of Excel and your pivot table version. All of my pivot table macros start with me performing operations in Excel and then generalizing the VBA from there.

#2 – Base your VBA on pivot fields

Pivot fields come from the column names in the data source for your pivot table. Even as the data is changing, the pivot fields remain constant because the construction and layout of the pivot table depends on the pivot fields. The fact that they remain constant can be very useful when writing VBA.

If you create macros that are based on particular pivot table items, you can’t be sure that those values will be there when the workbook is populated. For example, you want to make sure that all the groups for a particular row label are collapsed when the user first encounters the pivot table. You can manually collapse each of these groups. Problem: you create a macro that collapses groups “A”, “B”, “C”, etc separately. What if group “A” isn’t in your data set when the report is generated? Excel will throw an errror.

You can take the chance that group “A” may or may not appear in your data set, or you can create a macro that focuses on the pivot field that group “A” belongs to, rather than the individual entries.

ActiveSheet.PivotTables("PivotTable1").PivotFields("PivotField1").ShowDetail = False

This will collapse all the groups within ‘PivotField1’.

In short, avoid making macros that are dependent on specific data, because you can’t be sure that the VBA will execute without error.

#3 – VBA for pivot tables in Excel 2003 is different than in Excel 2007/2010

Excel 2003 had our best friend, the Pivot Table Wizard. Everything for the pivot table was done through a wizard menu, so the VBA in Excel 2003 follows suite. Starting in Excel 2007, Excel reworked how users interacted with pivot tables, and the Pivot Table Wizard was banished for eternity. Thus, VBA in Excel 2007/2010 is drastically different.

If you have end-users who are going to be opening a report with pivot table VBA in Excel 2003, 2007, and 2010, you’ll want to detect what version of Excel is being opened, then execute the 2003 or 2007/2010 based on this.

To determine what version of Excel the VBA is executing in, check Application.Version. This will return a string representing the version of Excel (e.g. 10.0, 12.0, 14.0 etc.)

#4 – Pivot tables have versions too

Just as there are differences between XLS and XLSX files in terms of what features can be supported, there are differences between pivot tables created in XLS files vs those created in XLSX files. What’s more, there are also differences between pivot tables created in Excel 2007 and 2010. It’s important to note what version of pivot table you’re targeting.

Luckily you can check the PivotTable.Version property to see which of the versions your pivot table is.

So there you have it – my cheat sheet for creating VBA for pivot tables.

Super Short Tips: Creating Workbooks with Excel VBA

Let’s say you want to write an Excel macro that will create a new workbook and save it to a specific location and then close the new file. This is really easy with Excel VBA:

Sub AddNewWorkbook()
     Set NewWb = Workbooks.Add
     With NewWb
          .SaveAs Filename:="C:\Path to directory\NewFile.xls"
          .Close
     End With
End Sub

You run this once and it works perfectly. You run it again and Excel tells you that “A file named ‘C:\Path to directory\NewFile.xls’ already exists in this location. Do you want to replace it?”

Well, of course you do. Why is Excel bothering you with these trivial questions?

So you want to supress the Excel alert. To do this, just set Application.DisplayAlerts to False before you save the file, and then turn it back on after you’re done:

Sub AddNewWorkbook()
     Set NewWb = Workbooks.Add
     Application.DisplayAlerts = False
     With NewWb
          .SaveAs Filename:="C:\Path to directory\NewFile.xls"
          .Close
      End With
     Application.DisplayAlerts = True
End Sub

Easy-peasy.

This technique is also handy for supressing the oh-so-lovely Do you want to save the changes you made to workbook X? alert. Microsoft has some additional tips for hiding the saving changes alert in this KB article: How to suppress “Save Changes” prompt when you close a workbook in Excel.