The COM version of OfficeWriter has been deprecated. However, some customers have existing applications that use the ExcelWriter and WordWriter COM dlls. The officially supported versions of OfficeWriter (v8.x and v9.x) no longer include the COM dlls. The latest versions of the COM dlls are ExcelWriter 7.6.1 and WordWriter 4.6.1. The last automated installer which contained the COM dlls was OfficeWriter version 4.5.1.
One of the most important things to know is that OfficeWriter’s COM dlls are 32-bit. If you are migrating an existing application to a 64-bit server, any application using OfficeWriter COM will need to be assigned to a 32-bit application pool.
This article provides more information about the points mentioned above, as well as anything else you may need to know about using OfficeWriter COM.
How do I know if my application is using OfficeWriter COM?
What functionality is included in the COM version of OfficeWriter?
Getting the Documentation
Getting the COM dlls
Installing ExcelWriter COM
Installing WordWriter COM
How do I know if my application is using OfficeWriter COM?
If your application is classic ASP, it is obviously using the COM dlls.
But there is another possible scenario. If you have an ASP.NET application using a very old version of ExcelWriter, your application may have a dependency on the ExcelWriter COM dll. This is because before the pure .NET version of ExcelWriter was released, we provided a .NET wrapper for the COM version. Note: If you are using OfficeWriter in .NET, we highly recommend migrating your code to use the pure .NET objects which are fully supported, more up-to-date, and fully 64-bit compatible.
Note: ASP.NET applications using only WordWriter will never have a dependency on COM. This is because WordWriter, a newer product than ExcelWriter, has always been a pure .NET product. (A COM-callable wrapper was provided for use with classic ASP)
To determine whether your .NET application has ExcelWriter COM dependencies:
- First check if your code is using the SoftArtisans.ExcelWriter namespace. This namespace contains all the interop classes provided by our .NET wrapper (The pure .NET objects, on the other hand, are all in the namespace SoftArtisans.OfficeWriter.ExcelWriter)
- If your application uses both the ExcelTemplate and ExcelApplication object and it was written using certain versions of ExcelWriter, you may find that your code references both namespaces mentioned above. This is because the pure .NET ExcelTemplate object was released before the pure.NET ExcelApplication object. ExcelTemplate .NET was released in ExcelWriter v5 (OfficeWriter v2) and ExcelApplication .NET was released in ExcelWriter v6 (OfficeWriter v3)
- If you see a reference to “SAEXCELLib” rather than SoftArtisans.ExcelWriter, your developers probably imported the ExcelWriter COM dll into a .NET project rather than using our custom .NET wrapper. The .NET framework will create a default wrapper if a COM dll is imported into a .NET project in Visual Studio.
What functionality is included in the COM version of OfficeWriter?
ExcelWriter COM Functionality and Limitations
ExcelWriter was already a mature COM product before the .NET version was introduced. The ExcelWriter COM dll has no dependency on the .NET dll, and it includes full ExcelTemplate and ExcelApplication functionality. However, in recent years, as most customers migrated to the .NET, many new features were added only to the .NET version. Therefore the COM version of ExcelWriter has some significant limitations, including:
- No support for OOXML file formats (.xlsx, .xlsm)
- No automatic grouping and nesting functionality (released in ExcelWriter .NET v7.1.0)
- Does not support all new Excel formulas introduced in Excel 2007 and above
- No server-side calculation engine (released in v9)
Wordwriter COM Functionality and Limitations
WordWriter is a pure .NET product with a COM-callable wrapper (CCW) provided for use with classic ASP. The CCW includes only the WordTemplate object. If you are using WordWriter in classic ASP, all the template-based functionality is available. However, since 4.6.1 was the last release, the COM version does not include any fixes or enhancements added to later versions. See the OfficeWriter change log to determine which new features and fixes were introduced after 4.6.1 and therefore are not included in WordWriter COM.
Getting the COM dlls
OfficeWriter version 4.5.1 was the last public release that included COM dlls in the installation package. It includes ExcelWriter 7.5.1 COM and WordWriter 4.5.1 COM. The latest versions of the COM dlls, ExcelWriter 7.6.1 and WordWriter 4.6.1, are available by request for customers with an active support contract. This request may be made using regular support channels.
Note: If you are planning to do a manual installation, you will also need a copy of LicenseManager.exe v4 or above in order to enter your OfficeWriter v4 (or ExcelWriter v7) license key. LicenseManager.exe is included in the automated installer package, or you can request a copy from Support together with your request for the COM dlls.
Getting the Documentation
The latest documentation for using ExcelWriter and WordWriter in classic ASP is included in the OfficeWriter v4 documentation, which can be downloaded here: http://support.softartisans.com/download/OfficeWriter4Documentation.zip
- ExcelWriter ASP documentation is in the file “EW-COM-7.pdf”
- Instructions for using WordWriter in classic ASP are included in the main WordWriter v4 documentation – “WW-4.pdf”
If you are using ExcelWriter COM through the interop in an ASP.NET application, there is no up-to-date documentation available for this configuration. However, there are some resources in older versions of the documentation that may be helpful.
- Installation instructions for ExcelWriter v5 (which has a pure .NET ExcelTemplate object and a .NET wrapper for ExcelApplication COM): http://support.softartisans.com/OfficeWriter/ExcelWriter/doc/install/install_net.asp
- The programmer’s reference for using ExcelApplication COM through the interop is here: http://support.softartisans.com/OfficeWriter/ExcelWriter/doc/reference/excelappobj.asp. In order to see C# and VB.NET code snippets, go to the upper left corner and select “Show code in ASP.NET”
- If you are using ExcelWriter v4 (not OfficeWriter v4), both ExcelTemplate and ExcelApplication were only available through the interop. Documentation is here: http://support.softartisans.com/excelwriterv4/doc/dotnet/dotnet_indepth.asp
Installing ExcelWriter COM
Installation instructions can also be found in the ExcelWriter v4 documentation.
-
Install an ExcelWriter v7 (or OfficeWriter v4) license key
The License Key can be entered using the full OfficeWriter installer or the LicenseManager.exe utility (version 4 or above)- LicenseManager.exe can be found in the program folder of an OfficeWriter installation on a different box
- or you can request a copy of LicenseManager from SoftArtisans support.
-
Register the COM dll – “SAXW7COM.dll”
In versions 4.5.1 and below, the OfficeWriter installer will register the COM dll automatically, but it won’t be the newest version of the dll. If you have an installer for v4.5.1 or below, one option is to run the installer and then copy over the newer dll and register it. That way you will have the full program folder in addition to the dlls.If you are doing a manual installation, or if you are updating a previous installation with the newer version of the dll:
- navigate to the directory containing the dll and enter:
regsvr32 SAXW7COM.dll
Note: On a 64-bit OS, make sure to use the 32-bit version of regsvr32, usually located in C:\Windows\SysWOW64. So you would enter:
C:\Windows\SysWOW64\regsvr32 SAXW7COM.dll
- Reset IIS by entering:
iisreset
- navigate to the directory containing the dll and enter:
- Make sure your application is running in a 32-bit process
- Open the IIS management console
- Create a new app pool or select an existing one
- Click on “Advanced Settings”
- Set “Enable 32-Bit Applications” to True
- Click “OK”
-
Check the system requirements
- The COM-callable wrapper (CCW), WordTemplateCCW.dll, is a COM object that makes internal calls to the WordWriter .NET assembly. Therefore, to use WordWriter in ASP, all of the system requirements for running WordWriter in ASP.NET must also be satisfied.
- Version 4.x of the CCW also has a requirement for the Microsoft Visual C++ 2005 SP1 Redistributable. If this is a 64-bit OS, make sure to get the 32-bit version of the C++ 2005 SP1 Redistributable. Download Visual C++ 2005 SP1 Redistributable for x86 systems
-
Install a v4 license key
The license key can be installed using the automatic installer or (if you are doing a manual installation) the LicenseManager.exe utility (version 4 or above)- LicenseManager.exe can be found in the program folder of an OfficeWriter installation on a different box
- or you can request a copy of LicenseManager from SoftArtisans support.
-
Put the WordWriter .NET assembly “SoftArtisans.OfficeWriter.WordWriter.dll “ in the GAC.
SoftArtisans.OfficeWriter.WordWriter.dll is a .NET assembly. The CCW allows you to use the .NET WordTemplate object from ASP. The assembly must be installed in the Global Assembly Cache (GAC) to allow the CCW to work.In versions 4.5.1 or below, the OfficeWriter installer will automatically put the WordWriter.NET assembly in the GAC, however it won’t be the latest version of the dll. Here is how to manually add the .NET assembly to the GAC:
- On versions of Windows prior to Windows 2008 or Windows 7, copy the file “SoftArtisans.OfficeWriter.WordWriter.dll” to C:\WINDOWS\Assembly.
- On Windows 7 or Windows 2008 and above, use gacutil.exe. Unless you have Visual Studio installed on the machine (which most servers do not), you may need to download the Windows SDK to get a copy of gacutil.exe.
Open a command prompt and navigate to the directory with the .NET dll and enter:gacutil /i SoftArtisans.OfficeWriter.WordWriter.dll
-
Register the COM dll “WordTemplateCCW.dll” with regsvr32
In versions 4.5.1 and below, the OfficeWriter installer will register the COM dll automatically, but it won’t be the newest version of the dll. If you have an installer for v4.5.1 or below, one option is to run the installer and then copy over the newer dll and register it. That way you will have the full program folder in addition to the dlls.If you are doing a manual installation, or if you are updating a previous installation with the newer version of the dll:
- navigate to the directory containing the dll and enter:
regsvr32 SAXW7COM.dll
Note: On a 64-bit OS, make sure to use the 32-bit version of regsvr32, usually located in C:\Windows\SysWOW64. So you would enter:
C:\Windows\SysWOW64\regsvr32 WordTemplateCCW.dll
- Reset IIS by entering:
iisreset
- navigate to the directory containing the dll and enter:
-
Make sure your application is running in a 32-bit process
The WordWriter .NET assembly is compiled with /anycpu and can run natively on 64-bit operating systems. However the CCW dll is 32-bit and must run in a 32-bit process.If your server is 64-bit, assign your virtual application to an application pool that is set to run in 32-bit compatability mode.- Open the IIS management console
- Create a new app pool or select an existing one
- Click on “Advanced Settings”
- Set “Enable 32-Bit Applications” to True
- Click “OK”
Since ExcelWriter COM is 32-bit dll, if your server is 64-bit you must assign your virtual application to an application pool running in 32-bit mode:
Installing WordWriter COM
Instructions for installing WordWriter for ASP can also be found in the WordWriter v4 documentation.
These are the main steps for installing WordWriter COM:


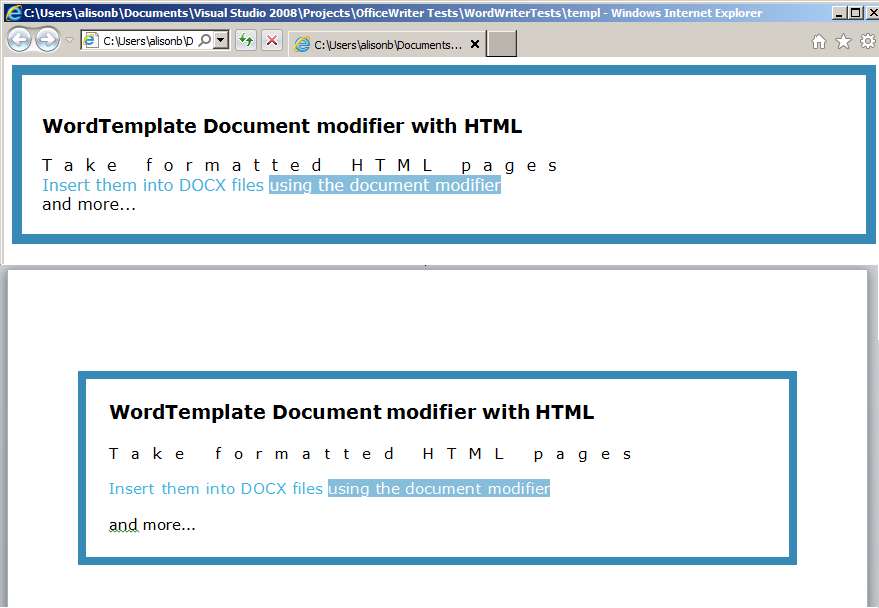

 One of the questions that comes up frequently when talking with customers is how can they get their images into their Word document with