Not going to lie, guys, I’ve been putting this post off for a while. (Ironic, as procrastination is exactly what Workflows aim to prevent.) To me, the term connotates TPS reports and dingy cubicles and unsheathed florescent overhead lights and perpetually sweaty officeworkers in greasy button-downs and Bluetooth headsets. Also, blandly enthusiastic sales execs talking about connection and knowledge share and koi ponds, though I’m not sure where that last image comes from. Butttt, here’s the thing: workflows provide a pretty useful method for keeping individuals and teams on track, through a series of automated steps triggered by the initialization or completion of a designated action.
Eg let’s say, completely hypothetically, that I am a fairly low-ranking business analyst at Kibble ‘n’ Krunchy Bits Corp. Let’s also say, again completely hypothetically, that I have this habit of uploading my weekly sales report to the sales team site, then wandering off to gchat for hours. So the reports just sit there without anyone looking at them for like, weeks at a time, and then at the end of the quarter everyone is surprised by how much sales of KrunchExtreme Lite with Passionfruit Extract ™ have grown. (Even though, hello, they should have known this because the factory workers and delivery men have all been putting in on average 13 hours of overtime a week for the past four months, figures which someone in a different department really should be keeping a better eye on.) A Workflow – in this case a modified Approval Workflow – provides me and my managers with an easy solution to this lack-of-awareness problem.
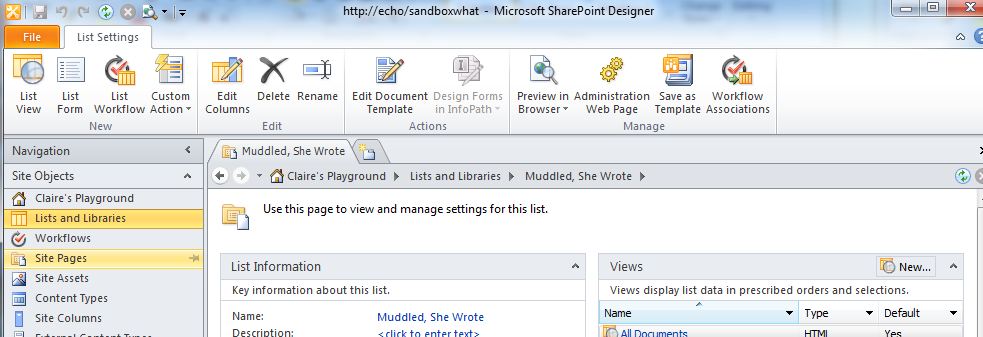
The Approval Workflow is one of the few workflow templates that are automatically available as features in a document library. Untouched, it routes an email to specified team members requesting approval every time a document is uploaded to an enabled library. In my case, though, we need a little extra functionality, and we’re going to add it in the dread SharePoint Designer. I say “dread” in jest, people. It’s easy, I swear! All you do is open up the designer, open the library to which you’d like to add the workflow, and select “List Workflow” from the ribbon:
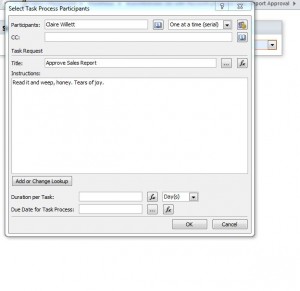
Then, specify a name (and a description, if you have a bad memory, or don’t feel like giving the workflow a descriptive title). Now you’ll be presented with a blank workflow with one step in it. Decide what this step should be. In my case, it’s “Start Approval Process,” and the nice thing about the SPD is it has an autofill, so I only have to start typing the word approval to see a list of options. After I select the step, I specify what should be in the approval task form fields, which item(s) I want the approval process to start with and who should be notified that I’ve started the workflow.
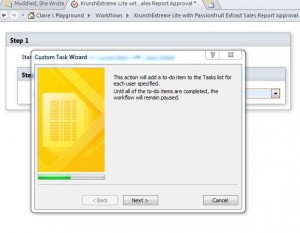
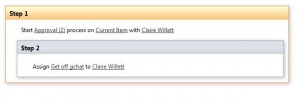
Okay, time for step 2! Click on the “Step” button in the ribbon. This second step is to assign a task to me, the business analyst. A nice little wizard will guide me through this task creation process.
Bingo.
Check for errors, then publish. From now on, whenever I upload a new sales report to this library, first an email will be sent to my managers requesting that they open and approve/reject my report, and once they’ve done so, an email will be sent to me telling me to get off gchat. #Foolproof
Of course, Approval isn’t the only workflow template SharePoint gives you OOTB: you also have Collect Feedback, Disposition (for deciding whether to keep/trash expired docs), Collect Signatures, Three State, Issue Tracking and Translation Management. You can use any of them as are, or customize them in the SPD. I should note that by “customize,” I mean either add conditions and actions from a pre-defined list or add a custom action created by one of your developers. If you need a workflow that is completely custom, you’ll need to write some code, and you’ll need to write it in Visual Studio 2010’s WF Workflow designer (in which case it’s a compiled workflow, whereas workflows made with SPD are declarative workflows). But if you need to do this, you’re probably not a novice end user, and thus, this post is not for you.
Related Posts:
- The Novice End User’s Guide to SharePoint Part 10: Metadata
- The Novice End User’s Guide to SharePoint Part 9: Customization
- The Novice End User’s Guide to SharePoint Part 8: My Sites
- The Novice End User’s Guide to SharePoint Part 7: Lists
- The Novice End User’s Guide to SharePoint Part 6: Libraries
- The Novice End User’s Guide to SharePoint Part 5: Pages
- The Novice End User’s Guide to SharePoint Part 4: Sites
- The Novice End User’s Guide to SharePoint Part 3: Permissions
- The Novice End User’s Guide to SharePoint Part 2: Basic Tasks
- The Novice End User’s Guide to SharePoint Part 1: Welcome
Share the post "NEUGS Part 11: Workflows, AKA Lifesavers for the Lazy"


 Follow