As mentioned previously, we started using WiX for our own installers. Out of the box, WiX can do pretty much anything you’d like, but sometimes you need to do a little something extra. One avenue we can use is a Custom Action (CA). There are quite a few types, but among the most useful is the Type 1 Custom Action. This style of action is a function call to an external Custom Action Dynamic Link Library.
These types of custom actions can call code from basically anywhere, so they can utilize existing code for things like validating a license key, or determining other requirements. In this tutorial I’ll show you everything you need to create a Type 1 Immediate Custom Action and link it into the installer.
Part 1: Creating and Hooking Up a Custom Action DLL
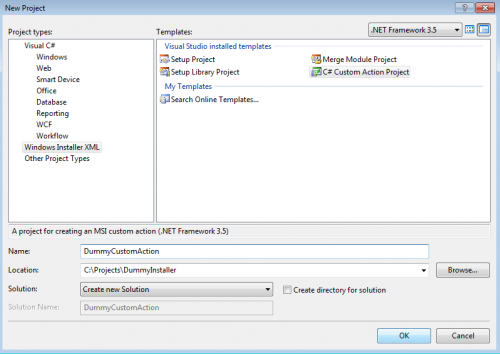
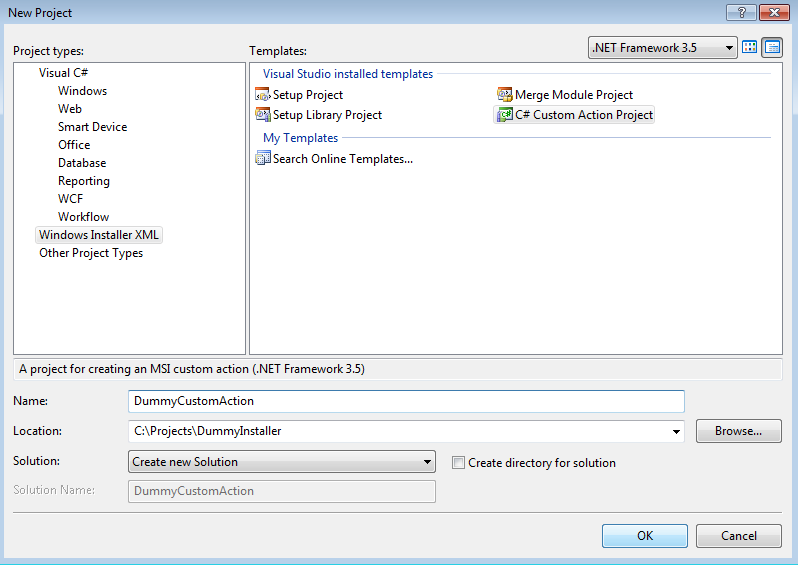
With Votive, setting up a DLL to be a Custom Action DLL is as easy as setting up a new project.
This Custom Action DLL can link in any other kind of DLL to itself, so if third party code is necessary for the Custom Action it can be utilized there. Linking in the Custom Action DLL itself is not done with references, however. Instead, we use the binary tag. When the Custom Action DLL is built, it will produce a .CA.dll file. This is the actual Custom Action DLL we want to link. We can use the Binary tag like so::
<Binary Id="DummyCustomActions"
SourceFile="..\DummyCustomActions\bin\debug\DummyCustomActions.CA.dll" />
|
The Binary tag should go somewhere within your Product tag. This will setup your Custom Action DLL to be linked to your WiX installer, but it won’t actually declare a custom action for you to call. For that, we need to actually define our custom action, and we need to declare it in our WiX project. If you use Votive to create a new Custom Action project (call it “DummyCustomActions”), you’ll end up with a CustomActions.cs file that looks like this:
Any Custom Action defined needs to possess the CustomAction attribute. It should also have the signature “public static ActionResult CustomActionName(Session session)”. The ActionResult type informs the WiX installer of the success or failure (among others) of this custom action. Currently, our default custom action will always return that it is successful. Depending on how the custom action is declared in WiX, this ActionResult may cause the install to continue or fail, or it may be ignored altogether. The session variable allows one to interact with the current installer session. This is particularly useful for getting and setting properties for the installer, which we will touch more on later. For now, it simply logs “Begin CustomAction1”. This log is extremely useful for debugging. To write the log to a text file, one can use msiexec:
msiexec /i msi_file.msi /l*v log_file.txt |
We haven’t actually hooked up our custom action to our actual installer yet, so we won’t see this logged yet.
Part 2: Hooking Up a Custom Action
If we’ve put in the Binary tag from above into our Product, and we’ve created our actual custom action, then we’ve hooked up our Custom Action DLL, but we haven’t yet hooked up the actual custom action. We can do this with the CustomAction tag:
<CustomAction Id="DummyCustomAction1" BinaryKey="DummyCustomActions"
DllEntry="CustomAction1" Execute="immediate" Return="ignore" />
|
It also goes somewhere within the Product tag. The BinaryKey attribute should point to the same Id as our DummyCustomActions binary, in this case “DummyCustomActions”. The DllEntry refers to the actual custom action to call. The execute attribute determines when, during the install sequence, a particular custom action will be called. “immediate” refers to actions happening during the UI sequence. The UI sequence is a sequence of standard actions that will occur during the user interface setup portion of the install. It is a sequence of actions that primarily perform information gathering steps. One should never schedule any action which will change something on the user’s system during the UI sequence. The other common option for Execute is “deferred.” This refers to actions which will change something, and are capable of being rolled back. They execute during the Install sequence. They also have additional restrictions in what they are able to accomplish. We’ll talk about the differences between the sequences and deferred vs immediate at a later time. For now, we’re simply going to use a simple immediate custom action to illustrate the link up. Lastly, the Return attribute determines what to do with the ActionResult we get back from our custom action. “ignore” will always simply ignore it and proceed on, but “checked” will fail the install if ActionResult.Failure is returned.
Part 3: Scheduling a Custom Action
We’ve hooked up a Custom Action DLL, we’ve hooked up our custom action, but we haven’t yet scheduled it to run. We can schedule an immediate action to run during the UI sequence like this:
<InstallUISequence> <Custom Action="DummyCustomAction1" After="CostFinalize" />
</InstallUISequence> |
It should go within the Product tag. The InstallUISequence tags lets us know this action will occur only during the UI sequence. The Action attribute on the Custom tag specifies which action we should run. The After attribute specifies after what action we should run this custom action. In this case, CostFinalize is the name of a standard action which occurs during any install. It calculates all the disk space necessary for the install. We are simply saying to run our custom action after that step. If we run our installer from the command line with the msiexec command above, we should see this in the log:
Action ended 13:43:39: CostFinalize. Return value 1.
MSI (c) (B8:04) [13:43:39:183]: Doing action: DummyCustomAction1
MSI (c) (B8:04) [13:43:39:183]: Note: 1: 2205 2: 3: ActionText
Action 13:43:39: DummyCustomAction1.
Action start 13:43:39: DummyCustomAction1.
MSI (c) (B8:0C) [13:43:39:185]: Invoking remote custom action.
DLL: C:\Users\nickm\AppData\Local\Temp\MSI5C8D.tmp, Entrypoint: CustomAction1
MSI (c) (B8:28) [13:43:39:187]: Cloaking enabled.
MSI (c) (B8:28) [13:43:39:187]: Attempting to enable all disabled
privileges before calling Install on Server
MSI (c) (B8:28) [13:43:39:187]: Connected to service for CA interface.
SFXCA: Extracting custom action to temporary directory: C:\Users\nickm\AppData\Local\Temp\MSI5C8D.tmp-\
SFXCA: Binding to CLR version v4.0.30319
Calling custom action DummyCustomActions!DummyCustomActions.CustomActions.CustomAction1Begin CustomAction1oneMSI (c) (B8!B4) [13:43:39:405]: PROPERTY CHANGE: Adding DummyProperty2 property.
Its value is 'two'.
Action ended 13:43:39: DummyCustomAction1. Return value 1.
In the first line above we see that the CostFinalize action ended, with a return value of 1. This indicates that the custom action completed successfully. The MSI then does some setup for the call to our custom action over the next eleven lines. On the second-to-last line, we see our output from session.Log. Lastly, our custom action returns a value of 1, indicating success. This came from the “return ActionResult.Success” line in our custom action above.
Part 4: Session Properties
The last thing we’re going to take a look at are session properties. Any defined property will be contained within the session variable in the custom action, as an index. This includes properties that were defined with a Property tag in WiX, as well as pre-defined properties. We can use the session variable’s indexer to get and set these properties like so:
[CustomAction]public static ActionResult CustomAction1(Session session)
{ session.Log("Begin CustomAction1");
string s = session["DummyProperty"];
session.Log(s);
session["DummyProperty2"] = "two";
return ActionResult.Success;
} |
The session indexer calls are literally looking for a property with the Id of “DummyProperty” and “DummyProperty2”. They do not need to be created before being accessed, but we’re going to create the first one with a Property tag, which goes somewhere within our Product tag:
<Property Id="DummyProperty" Value="one" />
|
If we build and run this with our msiexec command we should see two changes to the output log. The first is back where our custom action is actually called:
Action ended 13:43:39: CostFinalize. Return value 1.
MSI (c) (B8:04) [13:43:39:183]: Doing action: DummyCustomAction1
MSI (c) (B8:04) [13:43:39:183]: Note: 1: 2205 2: 3: ActionText
Action 13:43:39: DummyCustomAction1.
Action start 13:43:39: DummyCustomAction1.
MSI (c) (B8:0C) [13:43:39:185]: Invoking remote custom action.
DLL: C:\Users\nickm\AppData\Local\Temp\MSI5C8D.tmp, Entrypoint: CustomAction1
MSI (c) (B8:28) [13:43:39:187]: Cloaking enabled.
MSI (c) (B8:28) [13:43:39:187]: Attempting to enable all disabled
privileges before calling Install on Server
MSI (c) (B8:28) [13:43:39:187]: Connected to service for CA interface.
SFXCA: Extracting custom action to temporary directory: C:\Users\nickm\AppData\Local\Temp\MSI5C8D.tmp-\
SFXCA: Binding to CLR version v4.0.30319
Calling custom action DummyCustomActions!DummyCustomActions.CustomActions.CustomAction1Begin CustomAction1oneMSI (c) (B8!B4) [13:43:39:405]: PROPERTY CHANGE: Adding DummyProperty2 property.
Its value is 'two'.
Action ended 13:43:39: DummyCustomAction1. Return value 1.
|
Here we now write out the value of the first DummyProperty, which we pulled in from our actual WiX Project. The second bit is that we instantiated a totally new property called DummyProperty2, and set its value to “two”. In this manner we can pass information back and forth between our WiX installer and our custom actions. Another useful piece of information to look at is a large property list, located at the end of the file:
Property(C): DummyProperty = one...Property(C): DummyProperty2 = two |
This list at the end will show the last value of every property in the installer. It can be very helpful in debugging complex custom actions. With that, we’ve created a new Custom Action DLL and hooked it up to our installer. We created a new custom action and hooked that up to our installer too. We then scheduled the custom action to run during the UI sequence and looked at changing session properties in the MSI output log. That is only the start of what one can do with custom actions, but the linkup above can be the trickiest part.
:
<Binary Id="DummyCustomActions"
SourceFile="..\DummyCustomActions\bin\debug\DummyCustomActions.CA.dll" />
|
The Binary tag should go somewhere within your Product tag. This will setup your Custom Action DLL to be linked to your WiX installer,
Share the post "Creating and Hooking Up a Custom Action in WiX"


 Follow