Category Archives: Programming

Dr Dre Or How I Decided to Stop Worrying and Learn the Hardware

Every so many months I look up “X number of things every programmer should know” and do my best to incorporate one of those principles into my coding. There are some standard concepts: modularity, short methods, avoid “spaghetti code, ” understand what your compiler is actually doing, the four years and tens of thousands of dollars you spent on an education is worth nothing. Nothing.

My most recent gem is here. I actually found this article sometime ago and tl;dr-ed it, throwing it into the “Read This” folder. I’m not proud of shelving an article due to its length, nor that I ended the last sentence with a preposition, but that’s just how things went.

In any case, after rediscovering it, two points caught my eye. First, #5: Beauty is in Simplicity. (I’ll save you the trouble of changing tabs.) This section is about writing simple code that‘s also easy to read. Most of my short code is pretty much impossible to understand (kind of like this). Maybe it’s because all my variable names are in Bantu, but still it would be worth learning how to write simple code that another person could understand. New principle identified! That was until I saw #10: Consider the Hardware. According to this, lots of small functions aren’t necessarily the best for machine efficiency. Oh, good. Do I go with small methods for modularity and readability, or giant methods for more efficient execution?

The two aren’t actually exclusive, but they sure seem that way. Continue reading Dr Dre Or How I Decided to Stop Worrying and Learn the Hardware

The Programmer’s Guide to Choosing a Drink

Photo Credit: www.89thandbroke.com

To celebrate the commencement of Oktoberfest  festivities in Munich this weekend (and because it’s always fun to think about alcohol), we’re bringing you a handy-dandy guide to see how your programming languages match up to your favorite drinks. It’s important to be prepared –  If all the programming languages were to suddenly turn into drinks, we should know what sort of world we’d be getting (besides a very drunk one)!

C – Tequila.  It gets the job done quickly, but using it isn’t usually that great of an experience.  Everybody uses it at some point, but not too many stick with it unless there’s no other choice, or they need it to do its thing fast.  And if you don’t use it exactly right, chances are things are going to go horribly wrong.

Ruby – Scotch.  You can use it for years, and still discover strange new undertones you hadn’t noticed before.  And then you add a dash of water and discover everything is changed.  But it’s easy to ruin the magic if you don’t know what you’re doing.

Python – Irish Whiskey.  When first starting, you have two main options – Bushmills or Jameson?  Python 2 or 3?  But once you choose one and go with it, it’s remarkably smooth.  There’s not a huge amount of subtlety, but it’s pretty easy to get into and use.

Java – Vodka.  It’s everywhere.  It can be used in pretty much any situation, and most people are willing to use it when it’s the most convenient thing on hand.  But excluding a group of really dedicated fans, it’s not generally people’s first choice.  It just doesn’t have the same elegance as some of the alternatives.  But it can be mixed with other things pretty easily, for those who can’t stand using it straight.

Continue reading The Programmer’s Guide to Choosing a Drink

The Intern Diaries: Ingrid

This is the third installment of our Intern Diaries series, wherein each week our lovely interns try to give you the inside scoop on what being a programming intern at a high-tech startup is really like. [For Part 1 and Part 2] This week Ingrid tackles what makes for great code. See what she’s discovered below.

I’ve been considering what defines well-designed code this summer both via literature and my own experiences. It’s a big question so I’ve been taking my time, and slowly amassing a list of the characteristics of awesome code. However, this past week, the list has become longer and clearer in my mind because of the introduction of three-person code reviews. At this point, I’ve decided that the seven characteristics of stellar code are:

  1. Simplicity: the code takes the least convoluted and shortest way to resolve the issue.
  2. Readability: the code is formatted so it isn’t a pain to read. For example, I can assert with confidence that the C# ? operator can be easily replaced with an if/else statement just for the readability factor.
  3. Flexibility: if a piece of code is repeated frequently, can it be made into a method? Continue reading The Intern Diaries: Ingrid

What is ASP.NET Web API?

What is it?

ASP.NET Web API is functionality that was released as a part of ASP.NET MVC 4 that lets developers easily build HTTP-based web APIs on top of the .NET framework. It is available for Visual Studio 2010 SP1 or Visual Studio 2012.

Why should I be interested?

Web APIs are gaining more traction because of their ability to reach a wide variety of platforms. Unlike SOAP or WSDL-based services that use HTTP has a transfer protocol, web APIs fully embrace HTTP to convey information. It’s ridiculously easy to generate HTTP requests, which makes it simple to develop across different types of applications, operating systems, and platforms.  The success of using an HTTP-based web API is clear when you look at the companies that are already operating under this model, such as:  Facebook, Twitter, LinkedIn, Flickr, and Netflix. These organizations have hundreds of developers creating applications, particularly for mobile devices.

It’s not hard to see why ASP.NET would want to jump on this bandwagon.

I’m intrigued… What else do you have?

I watched Scott Guthrie‘s talk about ASP.NET MVC 4. Scott Guthrie is the Corporate VP in Microsoft’s Server and Tools Business division, which manages tools such as Azure, IIS, and ASP.NET.

Continue reading What is ASP.NET Web API?

One Solution for a “Service Unavailable” Error Message in IIS6

Are you encountering an “Object can’t be created” error or “Service Unavailable” error with your web applications when using a 64-bit OS and IIS6?

I was assisting a customer recently with what appeared to be a typical installation. He had a Windows Server 2003 (x64) machine, which was running IIS6. His classic ASP application was throwing an “Object can’t be created” error (ActiveX component can’t create object). This is a fairly common configuration error for customers running applications with 32-bit COM Objects on 64-bit operating systems. The typical resolution is to double check that the customer’s DLLs are registered properly in the registry. If that doesn’t fix things, we make sure that IIS6 is running in 32-bit compatibility mode:

cd %systemdrive%\Inetpub\AdminScripts
cscript.exe adsutil.vbs set W3SVC/AppPools/Enable32BitAppOnWin64 1

Unfortunately, after changing these settings his entire site was throwing a “Service Unavailable” error message.
Continue reading One Solution for a “Service Unavailable” Error Message in IIS6

Simple PowerShell Deployment Scripts

Stsadm is the standard for MOSS 2007. Although still available in SP2010, it is deprecated and should not be used. So let’s start with some basics of PS for SP.

  1. One does not simply use PowerShell: The commands are specifically geared for the SharePoint Management Shell. If you open Management Shell as an administrator and type each command in, it’ll work fine. However, when it comes to running scripts there are some issues.
  • You have to load the Microsoft.SharePoint.PowerShell snapin, like so:  “Add-PsSnapin Microsoft.SharePoint.PowerShell”
    • This may give you an error: “The local farm is not accessible.” You need to have your account enabled as a SharePoint Admin (see below)
  • Make sure you’ve set the execution policy. This one is easy, just use the “Set-ExecutionPolicy” command. The possible values are:
    • AllSigned – You can only run trusted signed scripts.
    • RemoteSigned – If the script is downloaded, it must be signed, otherwise just run it.
    • Restricted – This one is self explanatory. No one gets to run scripts. No nobody. Not nohow.
    • Unrestricted – Again, self explanatory. As a very wise English professor once told me, “Unrestricted is the opposite of restricted.” I never forgot that…
  • You always need root: You have to be an SP administrator in order to run SP commands from PowerShell. You can check your local permissions by:
    • Right clicking on SP Management Shell and running it as an administrator. This will give you access to admin privileges, but if your login isn’t a SP admin, then you can’t do any of this in regular PowerShell.
    • Typing “Get-SpShellAdmin”
    • Looking for your login.
    • If you aren’t on the list, you can use the current Shell to add yourself, like so: “Add-SpShellAdmin -UserName YOUR\UserName”
    • Now you should be able to execute SharePoint scripts in PowerShell.
  • Remember – All Files .Ps1.: The script has to be saved with extension .ps1.
    • You  shoud save as “All File Types” rather than “*.txt,” otherwise it may not work.
  • No execadmsvcjobs: That command is no longer available. So timer jobs have to be waited for a little differently.
  • ## Get the solution
    $Solution = Get-SPSolution -identity $SolutionFileName
    $lastStatus = ""
    ## loop whilst there is a Job attached to the Solution
    while ($Solution.JobExists -eq $True)
    {
     $currentStatus = $Solution.JobStatus
    	 if ($currentStatus -ne $lastStatus)
    	 {
    		Write-Host "$currentStatus…" -foreground green -nonewline
    		 $lastStatus = $currentStatus
    	 }
    	 Write-Host "." -foreground green -nonewline
      sleep 1
     }
     ## completed
     Write-Host ""
     Write-Host " "$Solution.LastOperationDetails -foreground green

    The Script
    I wrote a simple script that prompts for file name, webapp name, and what function you’d like to perform. It is based on the script found on Nik Patel’s SharePoint World blog. The difference between Nik’s and mine is that mine doesn’t check for everything before performing operations. If you choose to use it, you have to be aware that you might get an error; however, it is a very simple version and much easier to use/understand/modify.

    #####
    # Script to deploy Webparts/Solutions. Does not make use of feature installation
    # Kate Mogel 2012
    #
    # To use:
    # Place in folder with WSP file. Open powershell and cd into solution folder
    # Run script as admin, refering to local file (e.g. ./DeployScript.ps1)
    # Enter full file name (e.g. solution.wsp), web app name, and choose an operation
    #####
    param(
    [string]$solName = "$(Read-Host 'Enter WSP File name ')",
    [string]$webName = "$(Read-Host 'Enter WebAppName. i.e. http://SP2010APP ')",
    [string]$whichFunct = "$(Read-Host 'Enter IS to install, RS to remove, US to upgrade ')"
    )
    
    function main{
    
     #Check for snapin. Add if not present
     $snapin = Get-PSSnapin | Where-Object {$_.Name -eq 'Microsoft.SharePoint.Powershell'}
     if ($snapin -eq $null)
     {
            Add-PSSnapin Microsoft.SharePoint.Powershell
     }
    
    #Get location
    $solLoc = Get-Location 
    
      #Check the operation
      if($whichFunct -eq "IS")
      {
     	addSol
      }
      if($whichFunct -eq "RS")
      {
          Uninstall-SPSolution -Identity $solName -WebApplication $webName
      }
      if($whichFunct -eq "US")
      {
          Update-SPSolution -Identity $solName -LiteralPath $solLoc\$solName -GACDeployment
      }
    
    }
    
    #Function to add and install solution
    function addSol{
    	$Sol = Get-SPSolution | where-object {$_.Name -eq $solName}
    	if($Sol -eq $null){
    	    Add-SPSolution -LiteralPath "$solLoc\$solName" -Confirm:$false
    	    Install-SPSolution -Identity $solName -WebApplication $webName -GACDeployment
     	}
    }
    #Run Main Method
    main

    Okay. Go deploy your WSP.

    Visual Studio Runtime Interop Exception

    Recently I was working on a Project in Visual Studio 2008 that has some Web Services in it. Every time I opened the project I would get the error:

    System.Runtime.InteropServices.COMException

    According to a blog post by Marocanu2001, he was receiving this error because he did not have IIS installed.  However in my case this was not the issue. In my case it was because I was running Visual Studio in limited user mode, and not as an administrator. Without Administration rights, when Visual Studio tries to configure the web services in IIS it will throw this exception.

    The solution in short:

    • Make sure IIS is installed on your machine

    Make sure Visual Studio is run in Administrative mode. (Right-click “Run as Administrator”)


    Hope this works for you as well. Happy coding!

    Major Upgrades using WiX

    Major Upgrades using WiX

    Recently one of my colleagues wrote about his experience with WiX, and how he could create a simple installer in fifteen minutes. Today I want to talk about taking your newfound WiX installer to the next level by configuring your WiX installer to perform major upgrades.  In most cases a major upgrade means removing any previous version of an application and installing the new version.

    Depending on which version of WiX you are using, you have a couple of options to perform a major upgrade.

    Special Considerations:

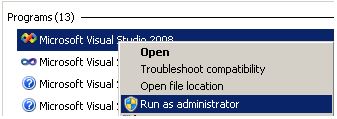
    Special considerations should be made before you start creating your installer. One of the most important ones in my opinion is deciding if your installer will be per-user or per-machine. By default WiX is a per-user install.  If you want your installer to be per machine you can add the following your solution:

    <!-- Install at a per-machine level and not per-user -->
    <Property Id="ALLUSERS" Value="1"/>
    

    Any upgrade that you make should use a consistent ALLUSERS property. If you decided to change this once your application is already deployed, a major upgrade will not be looking in the same place, and any new version of the installer will not be able to detect the old installed version. This can lead to multiple versions of the software installed on one system.

    WiX 3.5.1315.0 and later

    In version 3.5.1315.0 of WiX the Major Upgrade Element was introduced, which makes common upgrade scenarios very simple.

    It can be as simple as:

    <MajorUpgrade AllowDowngrades="no" DowngradeErrorMessage="A newer version of this application is already installed."/>
    

    If you try to run the installer on a system that already has a newer version you will receive an error with the DowngradeErrorMessage such as:

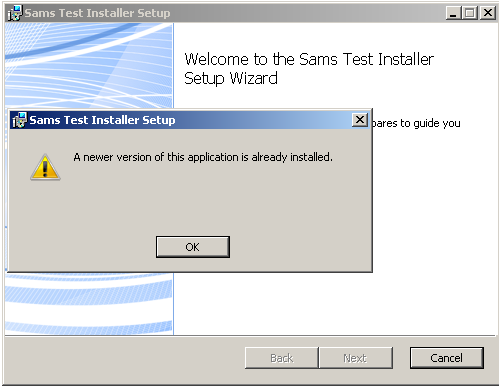
    However if you are indeed installing a new version, then the installer will automatically uninstall the old version and install the new version. How easy is that?!

    Pre WiX 3.5.1315.0

    If you are using a version of WiX before 3.5.1315.0 then you have to perform a major upgrade in a slightly more complicated way. Seeing as everyone may not be using the newer version of WiX, I think it is still worth explaining.  Note: What defines a Major upgrade is changing the Product Version and Changing the Product ID; just changing the product version will be considered a minor upgrade.

    Step  1   Define your GUIDS:

    Whenever you are ready to perform a major upgrade you will need to change your product’s GUID. The product GUID is how WiX determines major versions of the product. In my case I am using *, which will generate a new unique GUID every time I build my installer.

      <!-- * means WIX will generate a new GUID -->
    	<Product Id="*" Name="$(var.Product.Name)" Language="$(var.Product.Lang)" Version="$(var.Product.Version)" Manufacturer="$(var.Product.Manufacturer)" UpgradeCode="f47c5510-7e95-11e1-8027-bbc14824019b">
    		<Package InstallerVersion="$(var.Package.InstallerVersion)" Compressed="yes" Platform="$(var.Platform)" />
    

    Step 2 Define your condition message:

    <Condition Message="A newer version of this application is already installed.">
          <![CDATA[Installed OR NOT NEWER_VERSION_FOUND]]>
        </Condition>	
    

    Step 3 Define upgrade table:

    The upgrade table tells the installer what the versions it should detect are and how to respond. You will notice that when I detect newer versions, OnlyDetect = “true” because I do not want to replace newer versions of my product.

    <!-- Upgrade Table -->
        <Upgrade Id="f47c5510-7e95-11e1-8027-bbc14824019b">
          <UpgradeVersion
            Property="OLD_VERSION_FOUND"
            Minimum="1.0.0.0"
            Maximum="$(var.Product.Version)"
            IncludeMinimum="yes"
            IncludeMaximum="no"
            OnlyDetect="no"
            IgnoreRemoveFailure="yes"
            MigrateFeatures="yes"
            Language="1033"  />
    
          <UpgradeVersion
            Property="NEWER_VERSION_FOUND"
            Minimum="$(var.Product.Version)"
            IncludeMinimum="no"
            OnlyDetect="yes"
            Language="1033"  />
        </Upgrade>


    Step 4 define the Install Execute Sequence

        <!--Removes the old version and then installs the new version-->
        <InstallExecuteSequence>
          <RemoveExistingProducts After="InstallInitialize"></RemoveExistingProducts>
          <InstallExecute After="RemoveExistingProducts"></InstallExecute>
        </InstallExecuteSequence>
    

    And that’s it. I hope this helps others who are looking to perform major upgrades with their WiX installers. If you are working a lot with WiX, I recommend you check out the book WiX: A Developer’s Guide to Windows Installer XML  by  Nick Ramirez

    How to Set Up Sinatra on Bluehost

    sinatra rubygems

    I recently had to install Sinatra on bluehost. It proved troublesome so I’m documenting what I did. One curious handicap I had is I could not ssh into bluehost due to silly administrative reasons. Here’s what I did:

    Install the needed RubyGems

    First, from cPanel, I went into RubyGems (under Software/Services) and I installed the following packages:

    1. sinatra (version 1.3.2)
    2. tilt (version 1.3.3)
    3. rack (version 1.4.1)
    4. fcgi (version 0.8.8)

    You likely already have some of these so be sure to check the list first.

    Install the “.htaccess” file

    From the cPanel, I went to FileManager (under Files) and chose to browse the web root (Note: make sure you check “Show hidden files”). In public_html, I put in a new file called “.htaccess” and put the following fluff inside of it:

    # General Apache options
    AddHandler fcgid-script .fcgi
    AddHandler cgi-script .cgi
    #Options +FollowSymLinks +ExecCGI
    
    # If you don't want Rails to look in certain directories,
    # use the following rewrite rules so that Apache won't rewrite certain requests
    #
    # Example:
    #   RewriteCond %{REQUEST_URI} ^/notrails.*
    #   RewriteRule .* - [L]
    
    # Redirect all requests not available on the filesystem to Rails
    # By default the cgi dispatcher is used which is very slow
    #
    # For better performance replace the dispatcher with the fastcgi one
    #
    # Example:
    #   RewriteRule ^(.*)$ dispatch.fcgi [QSA,L]
    RewriteEngine On
    
    # If your Rails application is accessed via an Alias directive,
    # then you MUST also set the RewriteBase in this htaccess file.
    #
    # Example:
    #   Alias /myrailsapp /path/to/myrailsapp/public
    #   RewriteBase /myrailsapp
    
    RewriteBase /
    RewriteRule ^$ index.html [QSA]
    RewriteRule ^([^.]+)$ $1.html [QSA]
    RewriteCond %{REQUEST_FILENAME} !-f
    RewriteRule ^(.*)$ dispatch.fcgi [QSA,L]
    
    # In case Rails experiences terminal errors
    # Instead of displaying this message you can supply a file here which will be rendered instead
    #
    # Example:
    #   ErrorDocument 500 /500.html
    
    ErrorDocument 500 "<h2>Application error</h2>Ruby application failed to start properly"

    This file was taken, in large part, from the bluehost forum post linked at the bottom of the page.

    Install the “dispatch.fcgi” file

    In the same directory, I created the “dispatch.fcgi” file and put the following into that:

    #!/usr/bin/ruby
    #
    # Sample dispatch.fcgi to make Sinatra work on Bluehost
    #
    # http://www.sinatrarb.com/
    #
    
    require 'rubygems'
    
    # *** CONFIGURE HERE ***
    # You must put the gems on the path
    ENV["GEM_HOME"] = "/home#/XXXXX/ruby/gems"
    
    # sinatra should load now
    require 'sinatra'
    
    module Rack
      class Request
        def path_info
          @env["REDIRECT_URL"].to_s
        end
        def path_info=(s)
          @env["REDIRECT_URL"] = s.to_s
        end
      end
    end
    
    # Define your Sinatra application here
    class MyApp < Sinatra::Application
      get '/hi' do
        "Hello World!"
      end
    end
    
    builder = Rack::Builder.new do
      use Rack::ShowStatus
      use Rack::ShowExceptions
    
      map '/' do
        run MyApp.new
      end
    end
    
    Rack::Handler::FastCGI.run(builder)

    You need to replace “/home#/XXXX” with the appropriate path in your system.

    Correct all the date times in your gemspec files

    At this point, most other sources said I should be done, but I kept getting an error along the lines of:

    Invalid gemspec in [D:/RailsInstaller/Ruby1.8.7/lib/ruby/gems/1.8/specifications
    /tilt-1.3.3.gemspec]: invalid date format in specification: "2011-08-25 00:00:00
    .000000000Z"

    So what I had to do to fix it was go to “/ruby/gems/specifications/tilt-1.3.3.gemspec” in the file manager and change the line:

    s.date = %q{2011-08-25 00:00:00 .000000000Z}

    to

    s.date = %q{2011-08-25}

    If that wonky date format shows up on any other gemspecs, you’ll likely have to alter them as well.

    Hopefully, this will get you up and running. It did for me anyway.

    Sources

    Everything I learned I learned from the following sites and posts:

    Better living through user scripts

    The best feature of the web is the fact that once a page is served to your client, it’s yours.  There’s no such thing as a closed-source web page, only one that you haven’t looked at.  Better yet, any reasonably modern browser can inject your custom CSS and javascript into a web page after it’s been downloaded, to extend or enhance it any way you see fit.  As a celebration of the open web, here are three client-side additions to JIRA’s Greenhopper that I wrote to make my daily life better.

    Don’t Resolve Tasks

    Our Greenhopper workflow deals mostly with Stories and Tasks.  Both of those are stored as JIRA issues, so they can both be either Closed or Resolved.  The way we do things, it doesn’t make sense to Resolve a task, only ever Close it.  This short bit of CSS will remove the option to Resolve a task when it gets dragged into the Done column:

    .aui-popup .gh-aui ul li
    {
      display:none
    }
    .aui-popup .gh-aui ul :first-child
    {
      display:inline-block
    }

    Highlight Tasks By User

    Greenhopper sets different colors on different issue types.  This is nice, but I realized that what I really want is to be able to quickly distinguish tasks by who’s working on them, rather than what they are.  The following javascript will run through the Task Board and assign classes to each subtask based on who’s assigned to it (and run again whenever the page updates from dragging an issues):

    function addClasses() {
        var subtasks = document.getElementsByClassName("gh-issue");
    
        for (var i = 0; i < subtasks.length; i++) {
            var issue_body = subtasks[i].children[0].children[1];
            var assignee = null;
            for (var j = 0; j < issue_body.children.length; j++) {
                if (issue_body.children[j].getAttribute('data-fieldid') == 'assignee') {
                    assignee = issue_body.children[j].innerText.replace(' ', '').replace('\n', '').toLowerCase();
                }
            }
    
            if (assignee != null && subtasks[i].children[0].className.indexOf(assignee) < 0) {
                subtasks[i].children[0].className += " " + assignee;
            }
        }
    }
    
    document.addEventListener("DOMNodeInserted", addClasses);
    addClasses();

    Once that’s in place, I can add a little CSS to style different users.  For example, this turns all issues assigned to me green and bold:

    div.gh-issue-inner.seankermes {
      background-color:#384 !important;
      font-weight:bold;
    }

    Colored Columns

    Our Greenhopper task board has five columns at the moment, and there’s enough issues in it that when I scroll down past the column headers I can lose track of which issues are in which column based solely on their position.  This script sets the background color of each column section in the task board to a different color to make it easier:

    function colorColumns() {
        var colors = ["#e0e0d7", "#cca36e", "#614a48", "#f5e1a4", "#99948b" ]
        var cols = document.getElementsByClassName("gh-step-col")
        for (var i = 0; i < cols.length; i++) {
            cols[i].style.backgroundColor=colors[i%5]
        }
    }
    document.addEventListener("DOMNodeInserted", colorColumns);
    colorColumns();

    All the code here can be installed in your very own browser either by default (Chrome handles .user.js files as extensions) or with browser add-ons like Stylish and Greasemonkey